JFrog Artifactory
Introduction
Bunnyshell supports connecting JFrog Artifactory registries to your organization, allowing you to use those registries to store your container images and deploy them on Kubernetes clusters.
Before you proceed, make sure you have administrator privileges on your JFrog registry.
Only user and password authentication is currently supported.
Accounts that authenticate with Google and Github are not supported, so you will need to create and username and password.
Create your repository
-
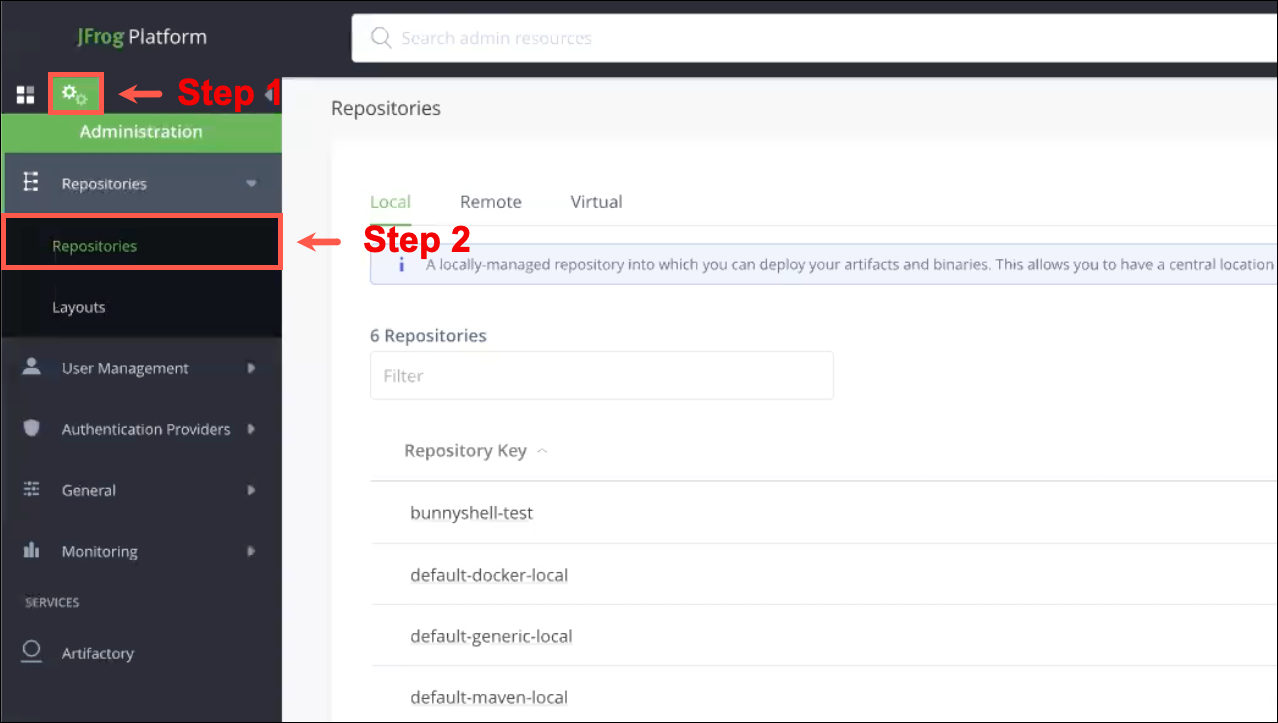
In the JFrog platform, click on the Administration icon on the left side menu.
-
Go to Repositories.
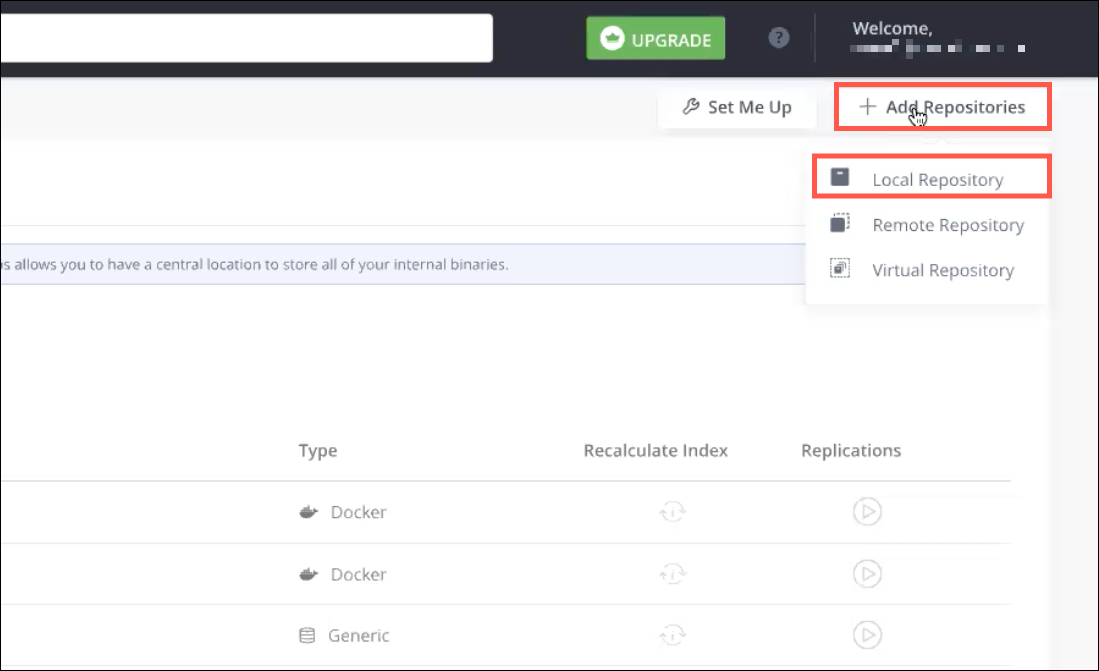
- Click on +Add Repositories and select Local Repository.
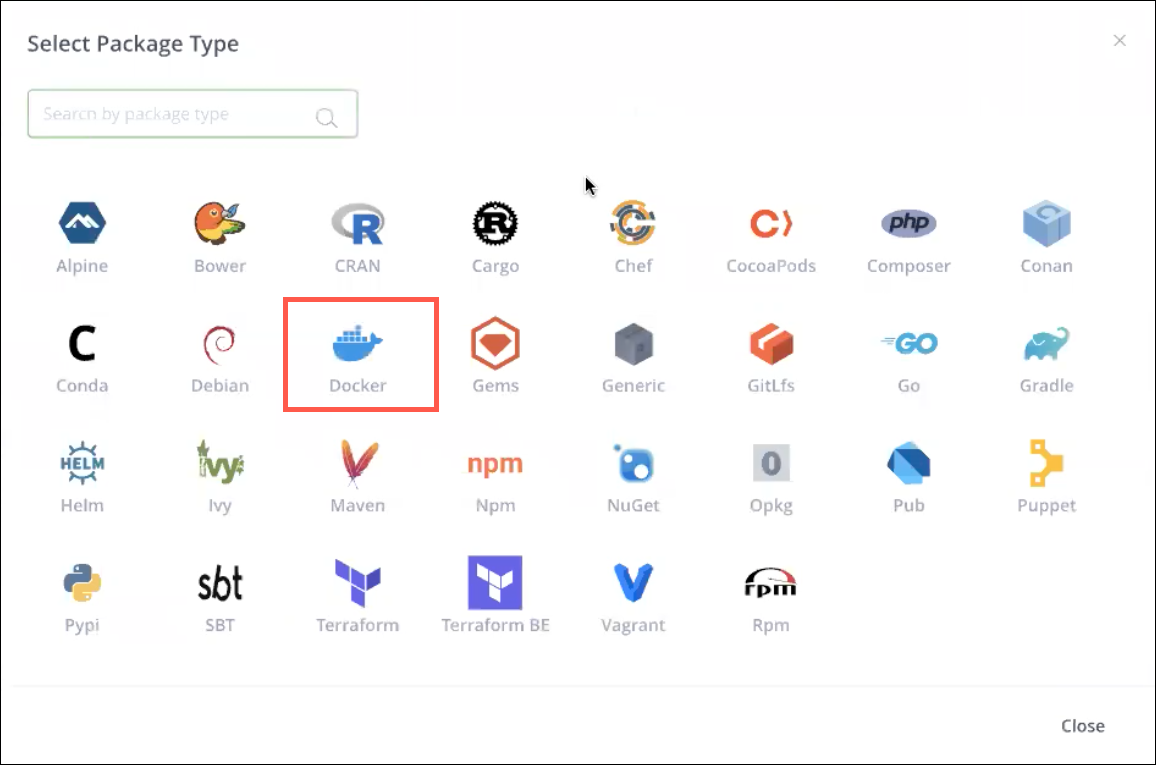
- Select Docker.
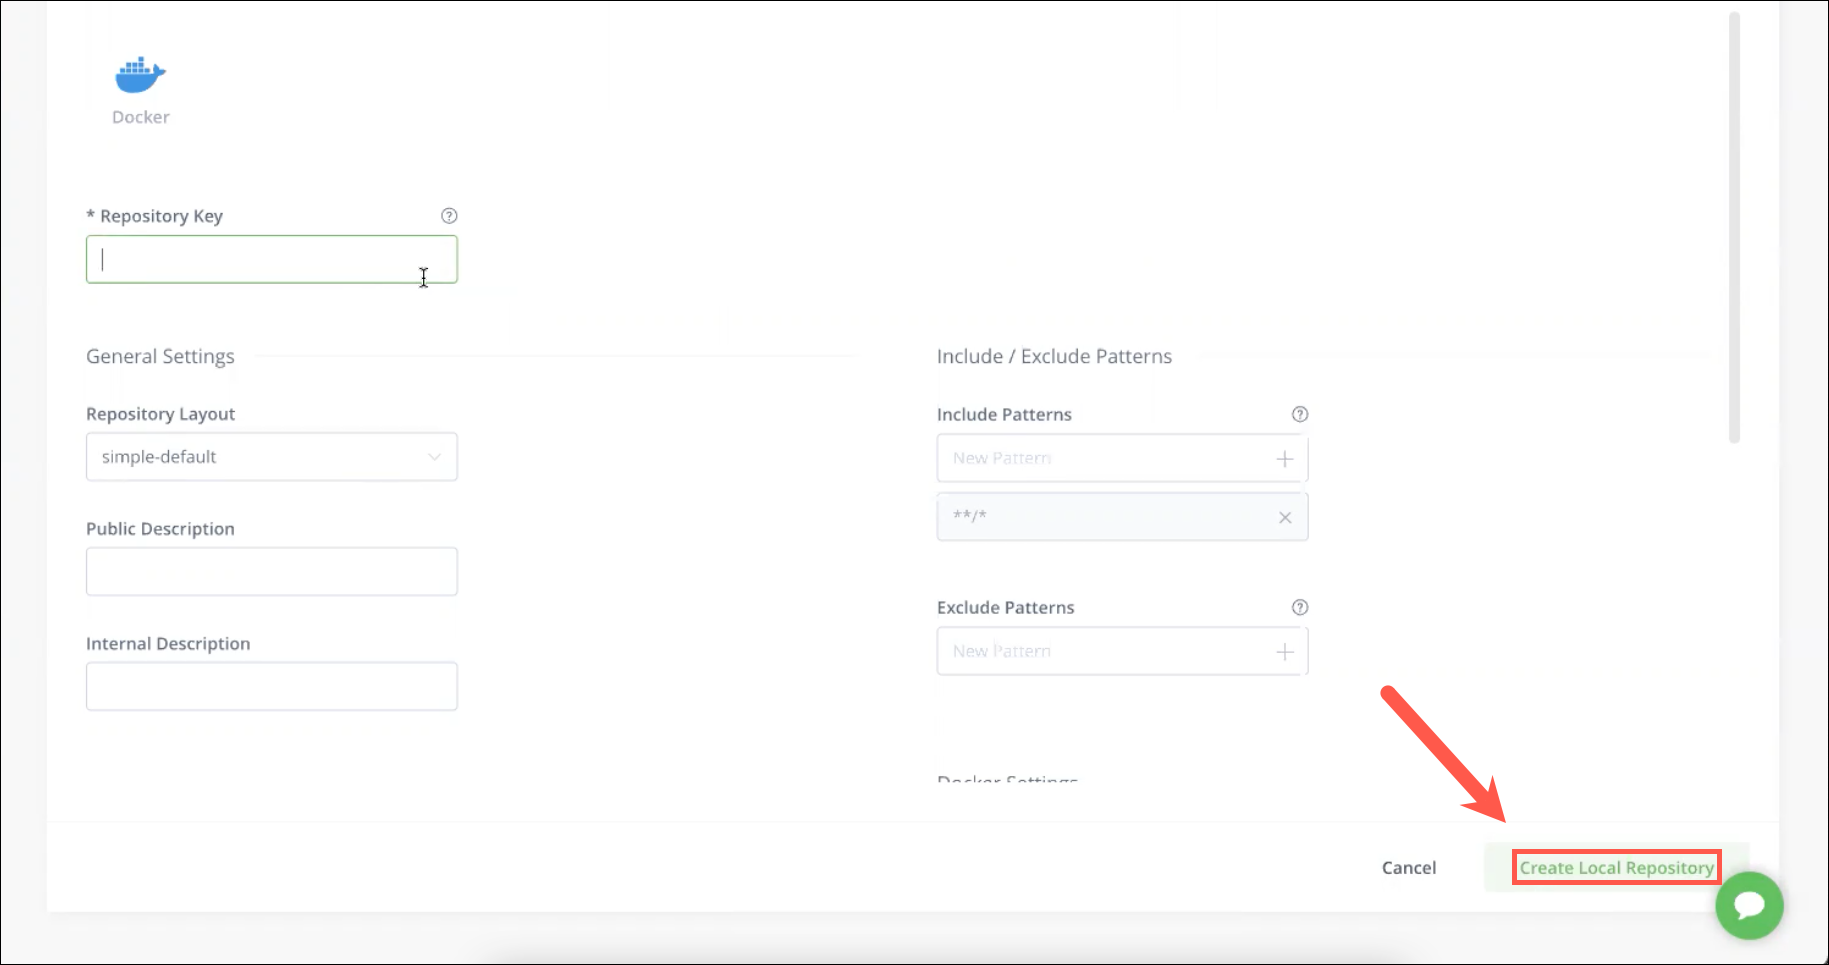
- Fill in all the necessary information and click Create Local Repository.
Configure Authentication
- In the JFrog platform, click on the User Menu icon on the top right corner, then click Edit Profile
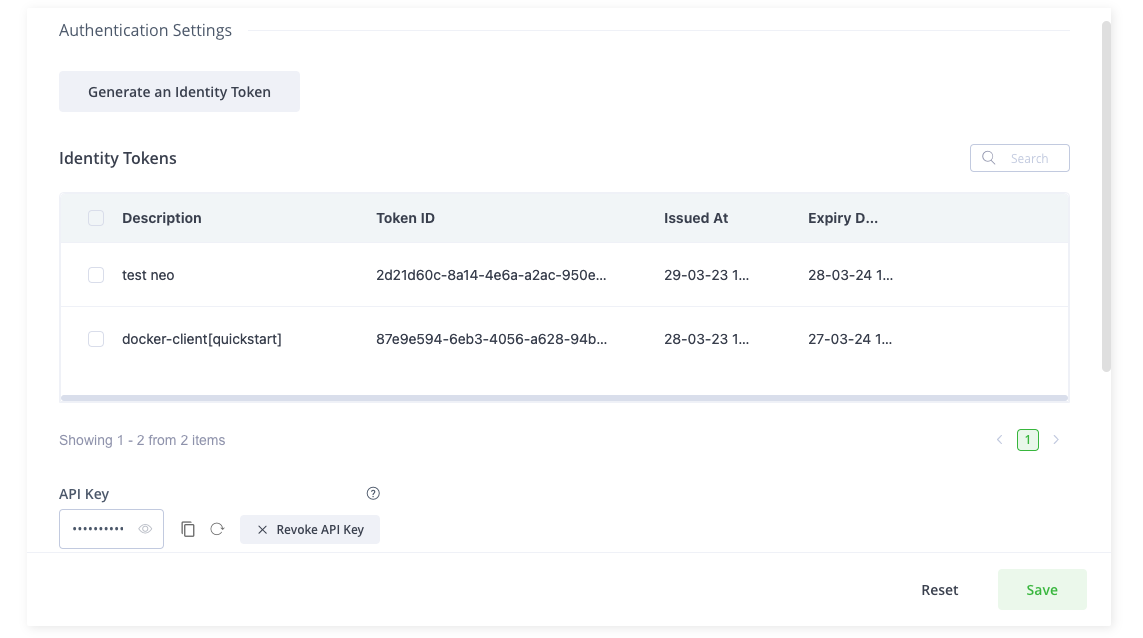
- You can generate an API Key if you don't already have one, or you can generate an Identity Token. For Identity Token use the reference token value.
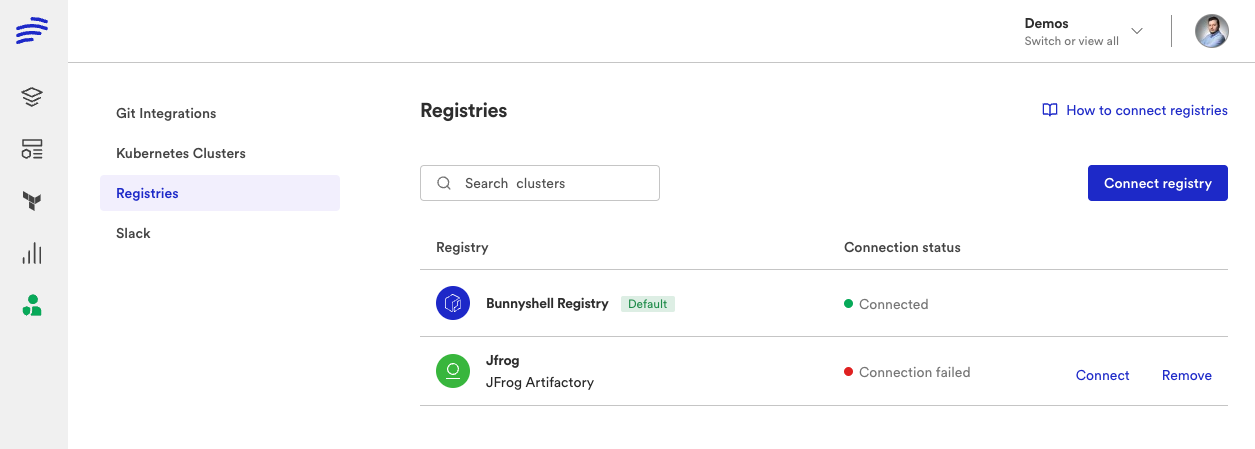
- For Identity Tokens keep in mind that these will expire, so after a period you will see in Bunnyshell the integration as Connection failed. Just click Connect, set a new Identity Token in Artifactory API Key, then click Connect
Connect your JFrog registry
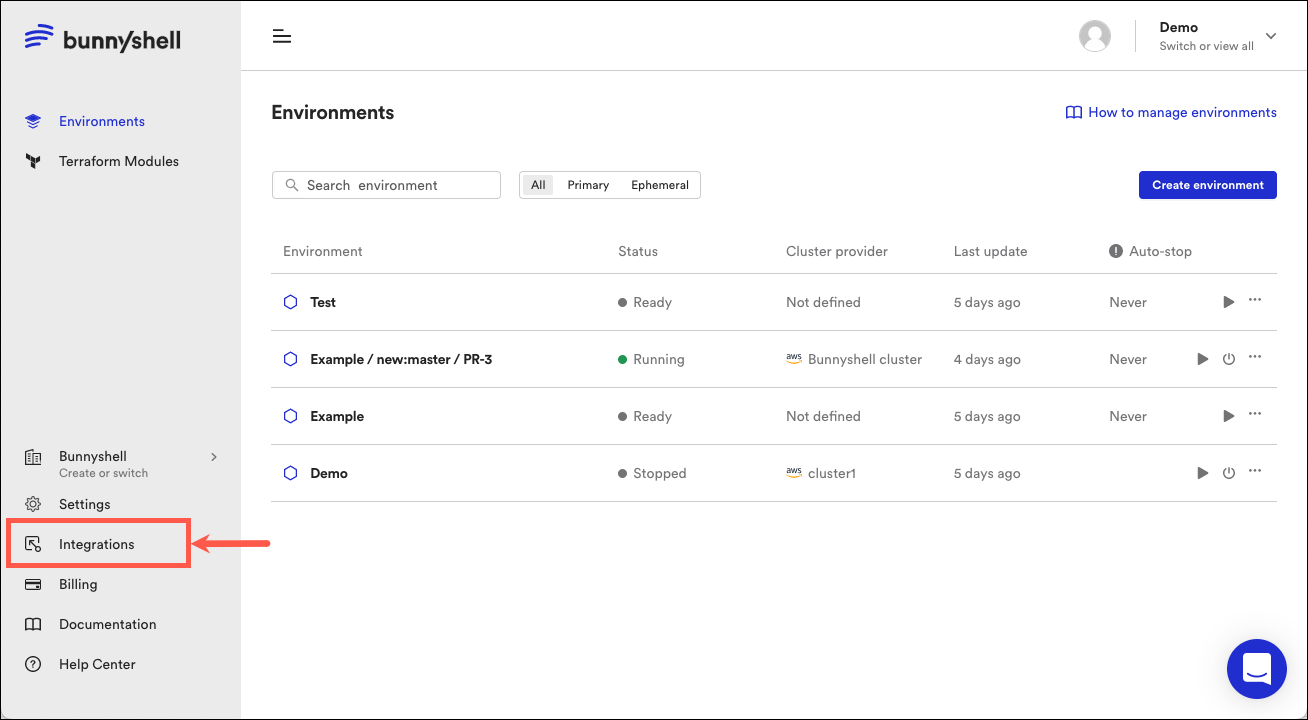
- Access the Bunnyshell interface and click the Integrations button on the left side.
-
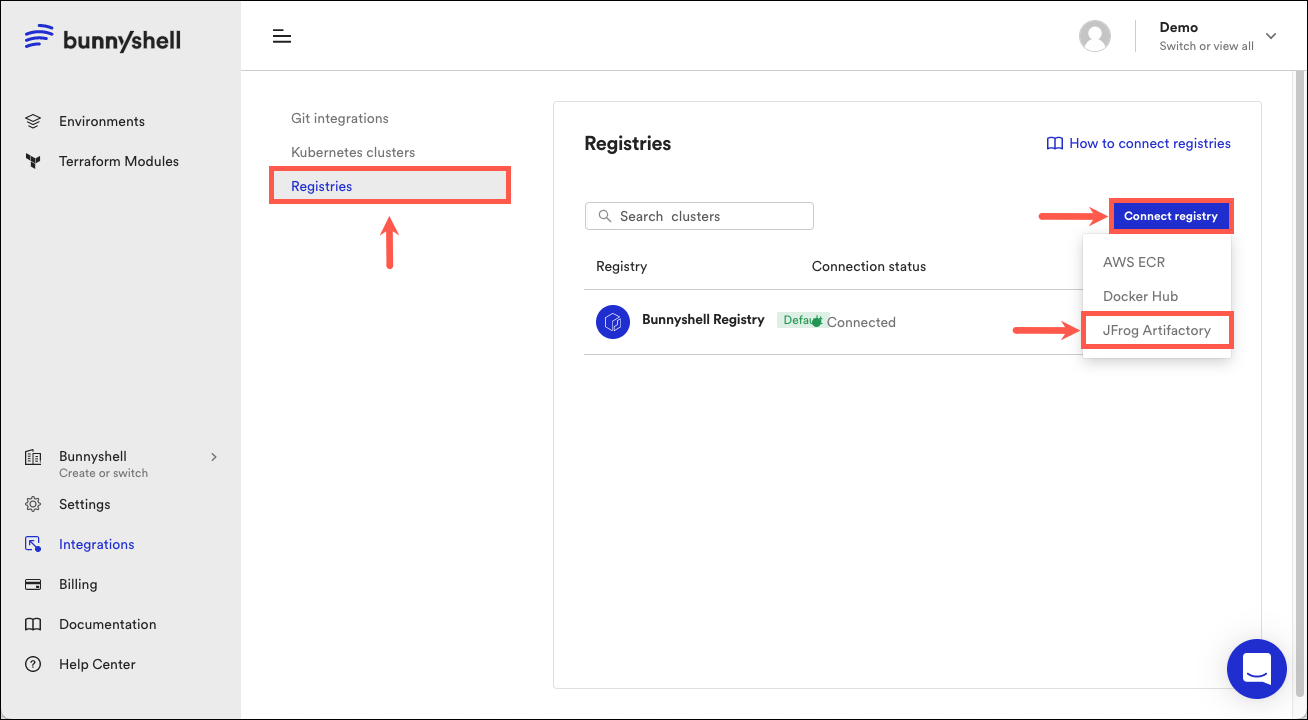
Click Container Registries on the left-side menu.
-
Click the Connect container registry button and select JFrog Artifactory.
- A new window will pop-up, where you will have to provide the following information:
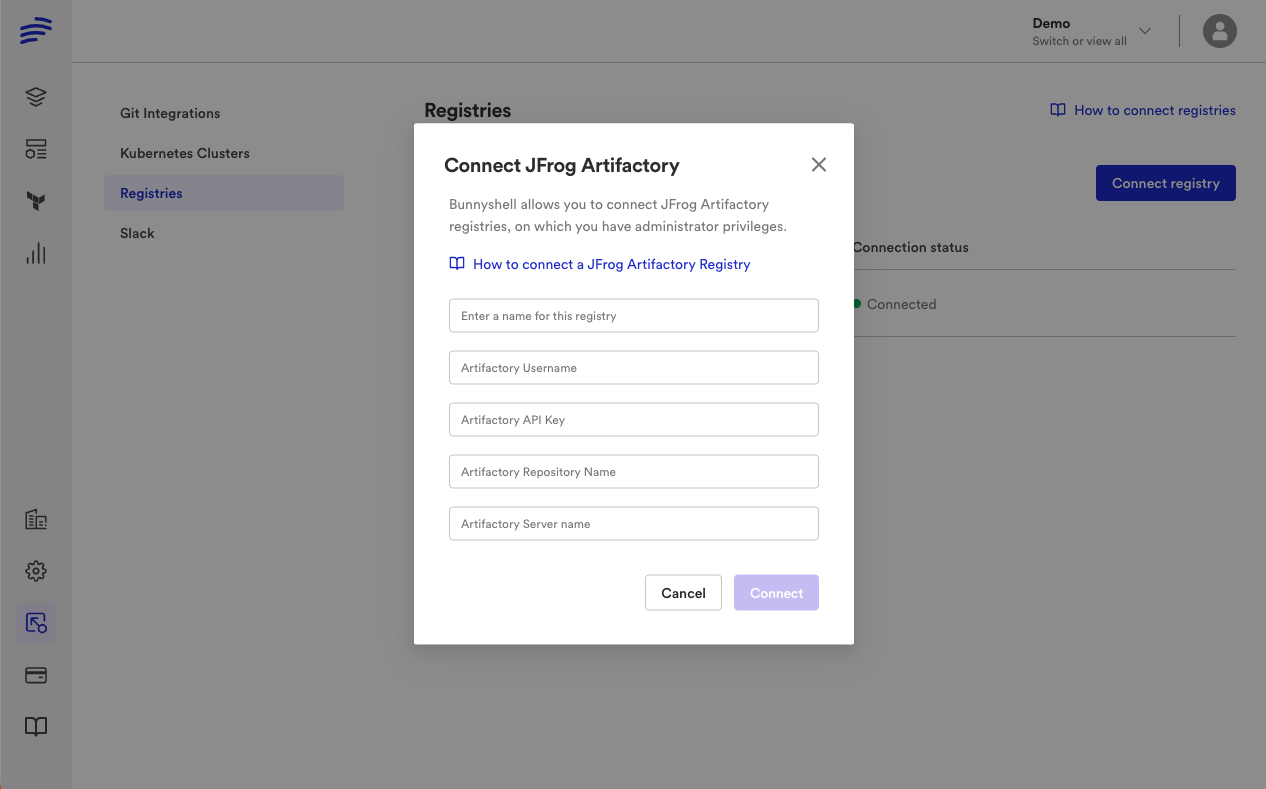
- Registry name: pick a name for your registry when you connect it to Bunnyshell.
- Artifactory Username: The username you chose when you created your JFrog Artifactory account.
- Artifactory API Key: The API Key or an Identity Token created in your JFrog Artifactory account.
- Artifactory Repository Name: The name you've chosen for your repository. The Artifactory Repository Name must not contain uppercase letters.
- Artifactory Server Name: The name you've given to your environment when creating your JFrog account. You can also retrieve it from the address bar.
For example, in the addressexample.jfrog.io, example is the Server Name.
Updated 6 months ago
