Debugging Java
Port Forwarding for Java
Debugging Java requires the debugger to connect to the JVM, so a (forward) port forward will be required.
The default debugger port is 5005 and we have not changed it, but if you have configured it to something else, don't forget to replace it in all steps below.
For the example below we used the Java Spring Boot application from our templates repository: https://github.com/bunnyshell/templates/tree/main/components/springboot-rest-api
Starting Remote Development
Step 1. Start remote development in Bunnyshell
You can start remote development and determine the Component using the built-in wizard, or you can specify it directly. Please see the start documentation for more details.
Since you need a port forwarding for the 5005 port, in Bunnyshell you would write the port forward as 5005>5005. Basically, you would need to run something similar to the command below, but replacing the Component ID with your own:
$ bns remote-development up --component RZmMRQX0kV --port-forward "5005>5005"The local path (the one on your machine) will be requested, as the source of the code sync. It is automatically pre-filled with the current folder.
$ bns remote-development up --component RZmMRQX0kV --port-forward "5005>5005"
? Local Path [tab for suggestions] (/Users/myuser/playground/springboot-rest-api)
Then, you will need to provide the path within the container, which represents the target for the code sync.
$ bns remote-development up --component RZmMRQX0kV --port-forward "5005>5005"
? Local Path /Users/myuser/playground/springboot-rest-api
? Remote Path
After providing it, Bunnyshell starts to perform the Remote Development changes within your cluster: a PersistentVolumeClaim is attached to your Pod and the container's command is changed, so you can have an SSH terminal (or more) into the container and ports forwarded, as well as for the file sync to happen.
$ bns remote-development up --component RZmMRQX0kV --port-forward "5005>5005"
? Local Path /Users/myuser/playground/springboot-rest-api
? Remote Path /app
\ Waiting for pod to be ready
You can provide the local path and remote path also via command parameters, --local-sync-path (or -l) and --remote-sync-path (or -r).
After the Pod definition is changed, you will be having access to the container itself through and SSH shell.
$ bns remote-development up --component RZmMRQX0kV --port-forward "5005>5005"
? Local Path /Users/myuser/playground/springboot-rest-api
? Remote Path /app
/app #
Once you're in, you need to start the JVM process with debugging capabilities, so you need to include the -agentlib:jdwp=transport=dt_socket,server=y,suspend=n,address=8000 argument. For our Spring Boot example, this means running the ./mvnw spring-boot:run -Dspring-boot.run.jvmArguments="-agentlib:jdwp=transport=dt_socket,server=y,suspend=n,address=8000" command.
So, to conclude, just run:
$ bns remote-development up --component RZmMRQX0kV --port-forward "5005>5005"
? Local Path /Users/myuser/playground/springboot-rest-api
? Remote Path /app
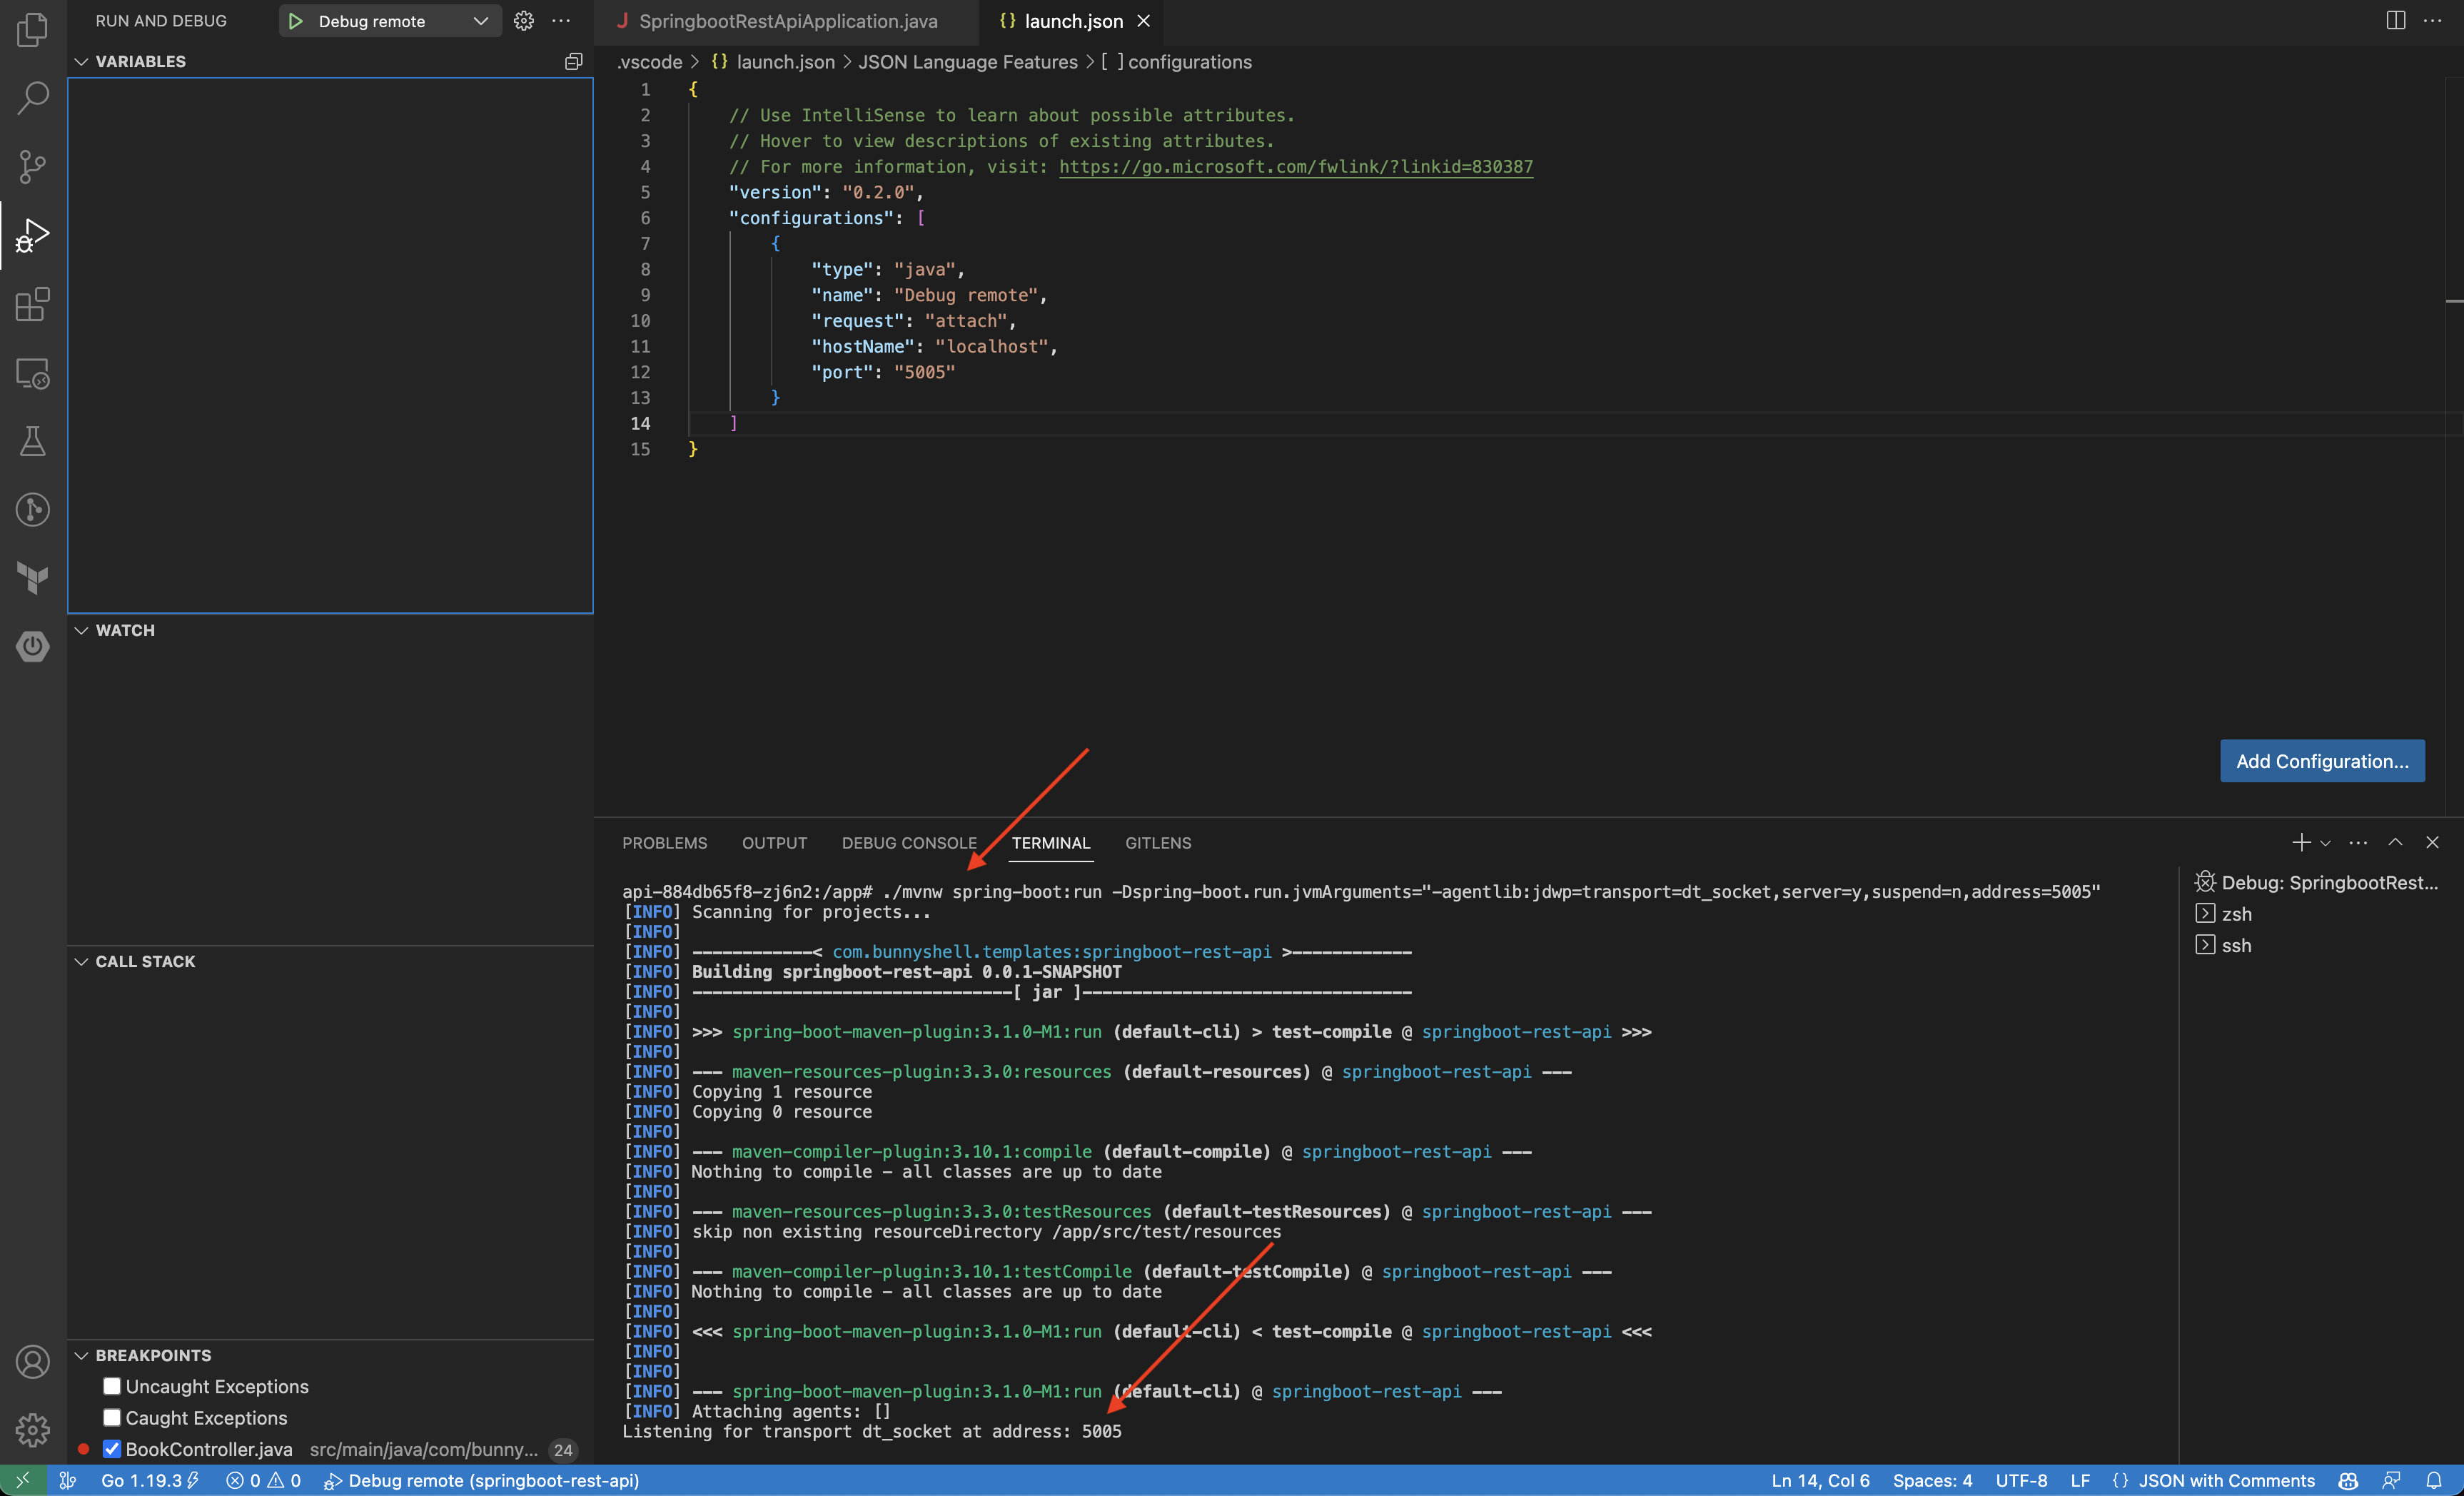
/app # ./mvnw spring-boot:run -Dspring-boot.run.jvmArguments="-agentlib:jdwp=transport=dt_socket,server=y,suspend=n,address=5005"
You will see in the output of the command, the confirmation that the debugger is listening on port 5005
$ bns remote-development up --component RZmMRQX0kV --port-forward "5005>5005"
? Local Path /Users/myuser/playground/springboot-rest-api
? Remote Path /app
/usr/src/app/backend # ./mvnw spring-boot:run -Dspring-boot.run.jvmArguments="-agentlib:jdwp=transport=dt_socket,server=y,suspend=n,address=5005"

...
[INFO] Attaching agents: []
Listening for transport dt_socket at address: 5005
...
Setting up VS Code
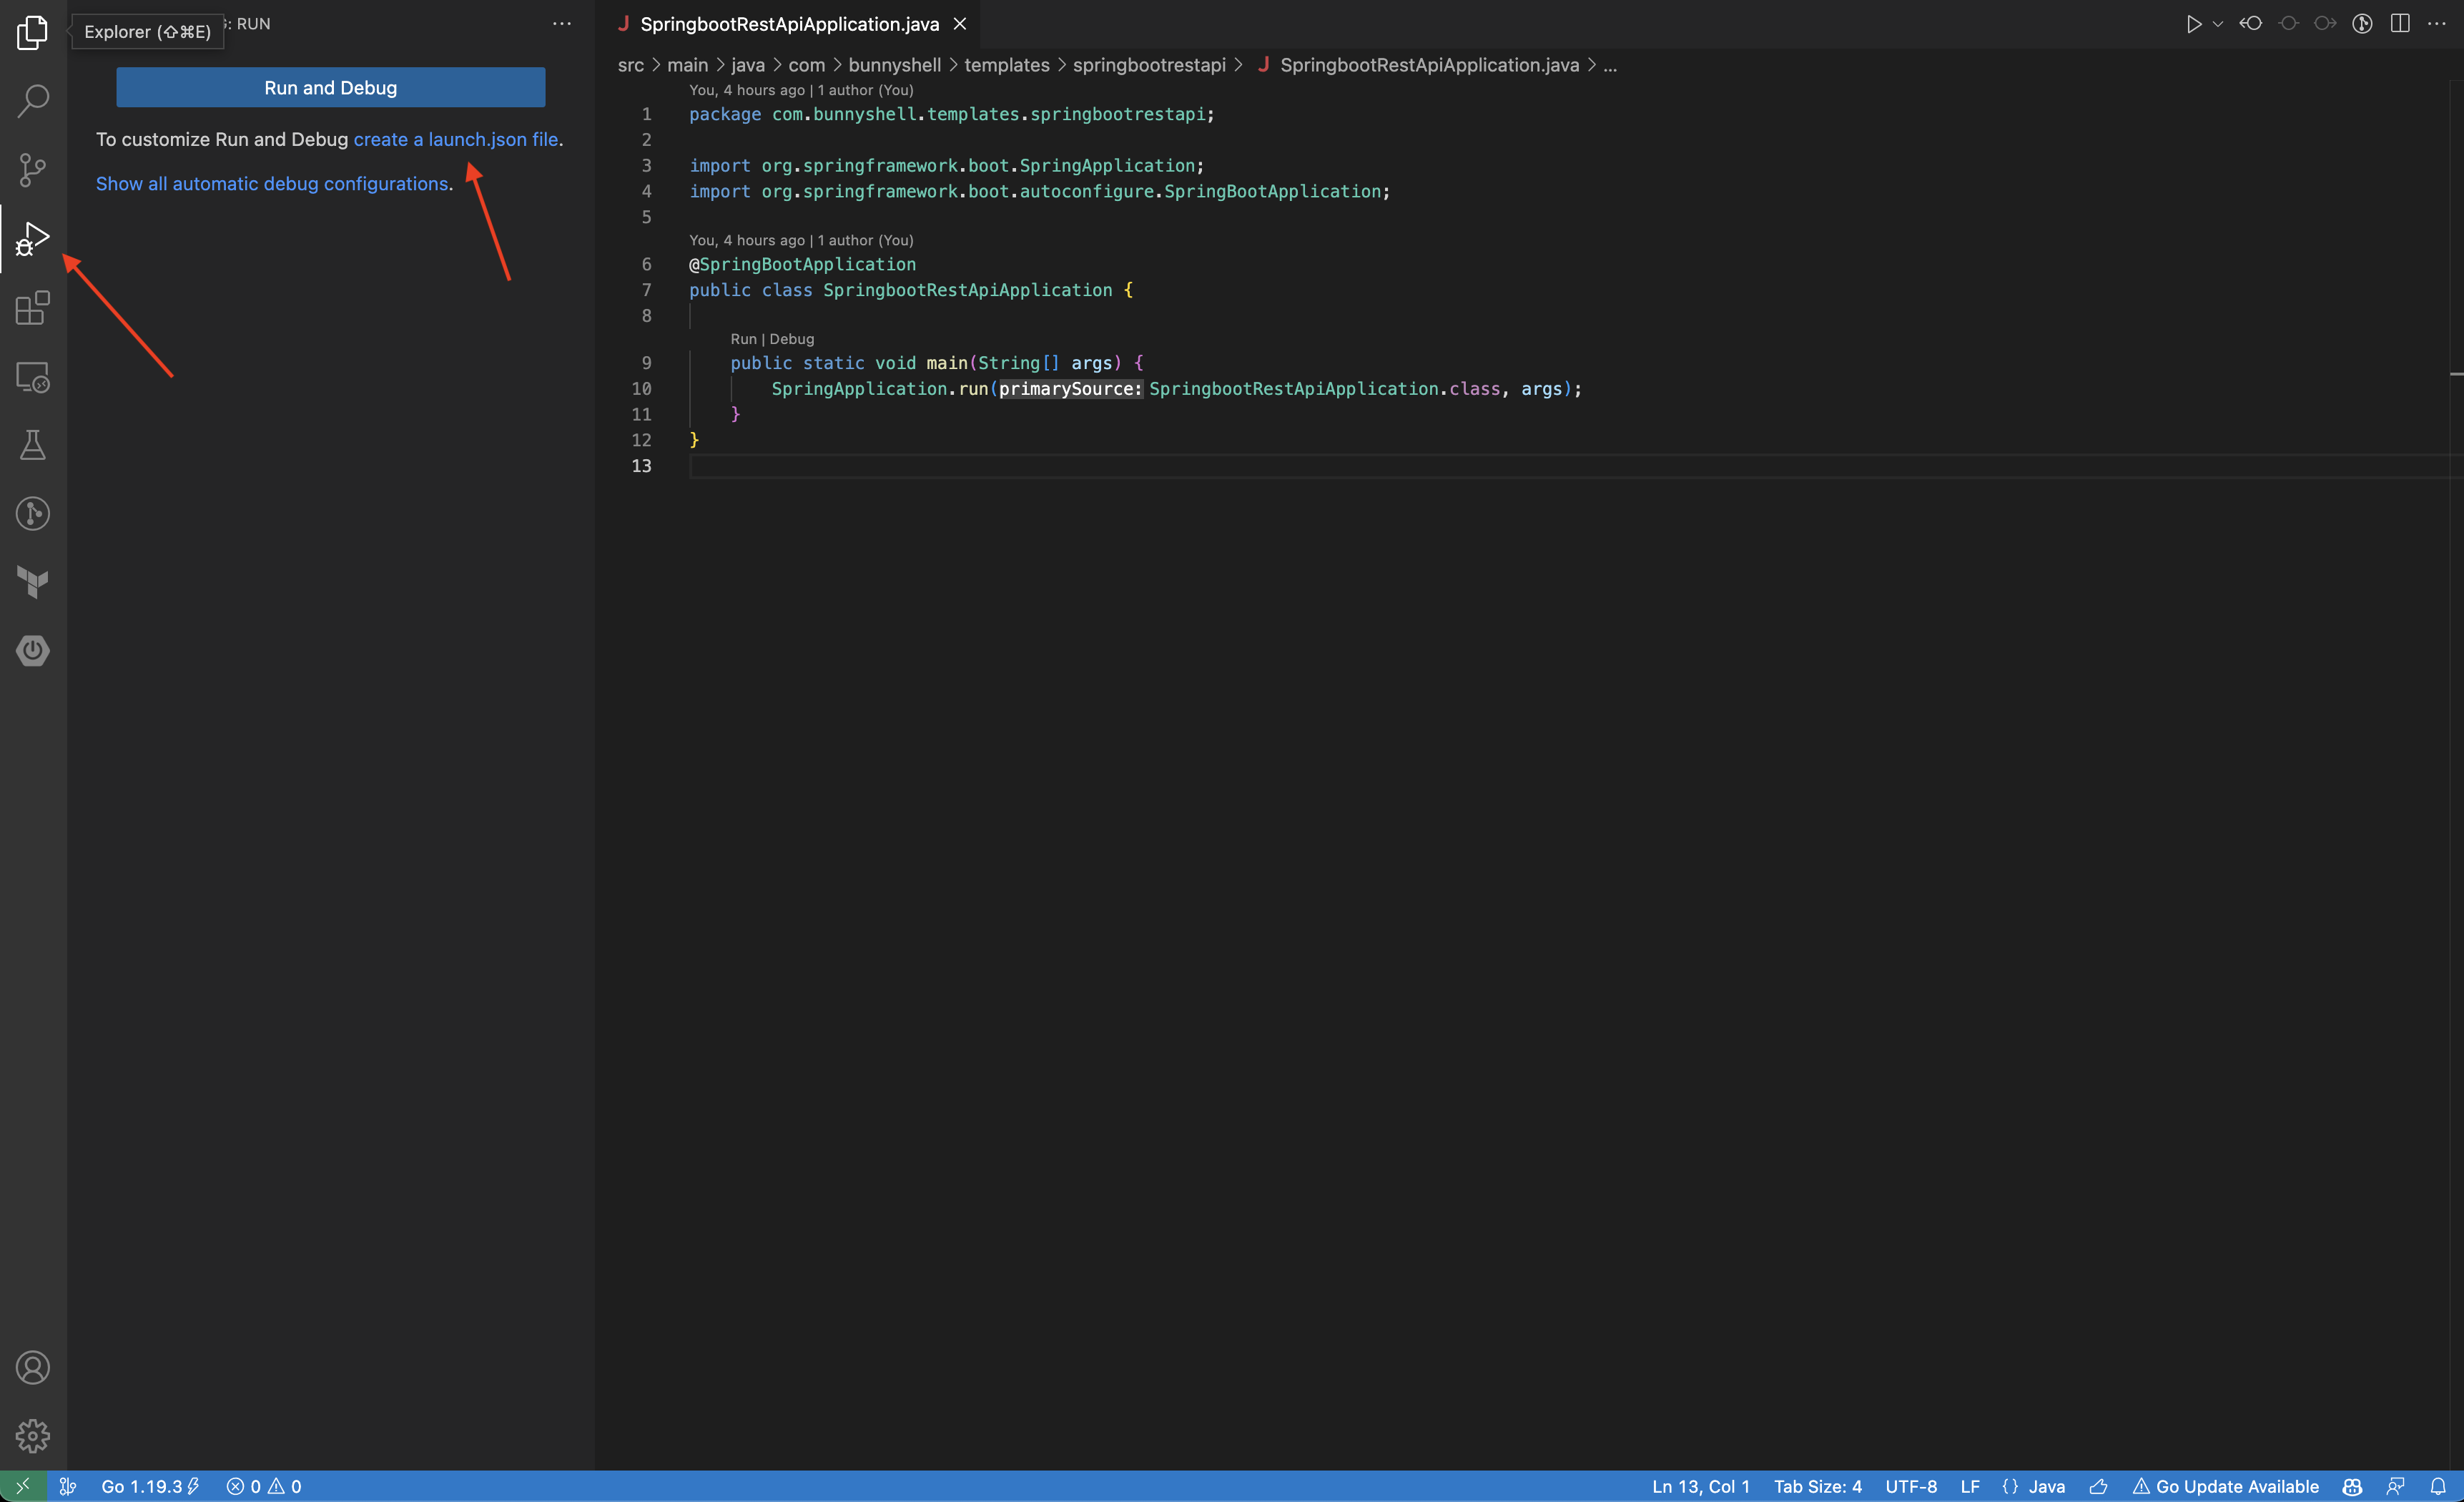
- Go to the Run and debug panel on the left navigation menu, then click create a launch.json file.
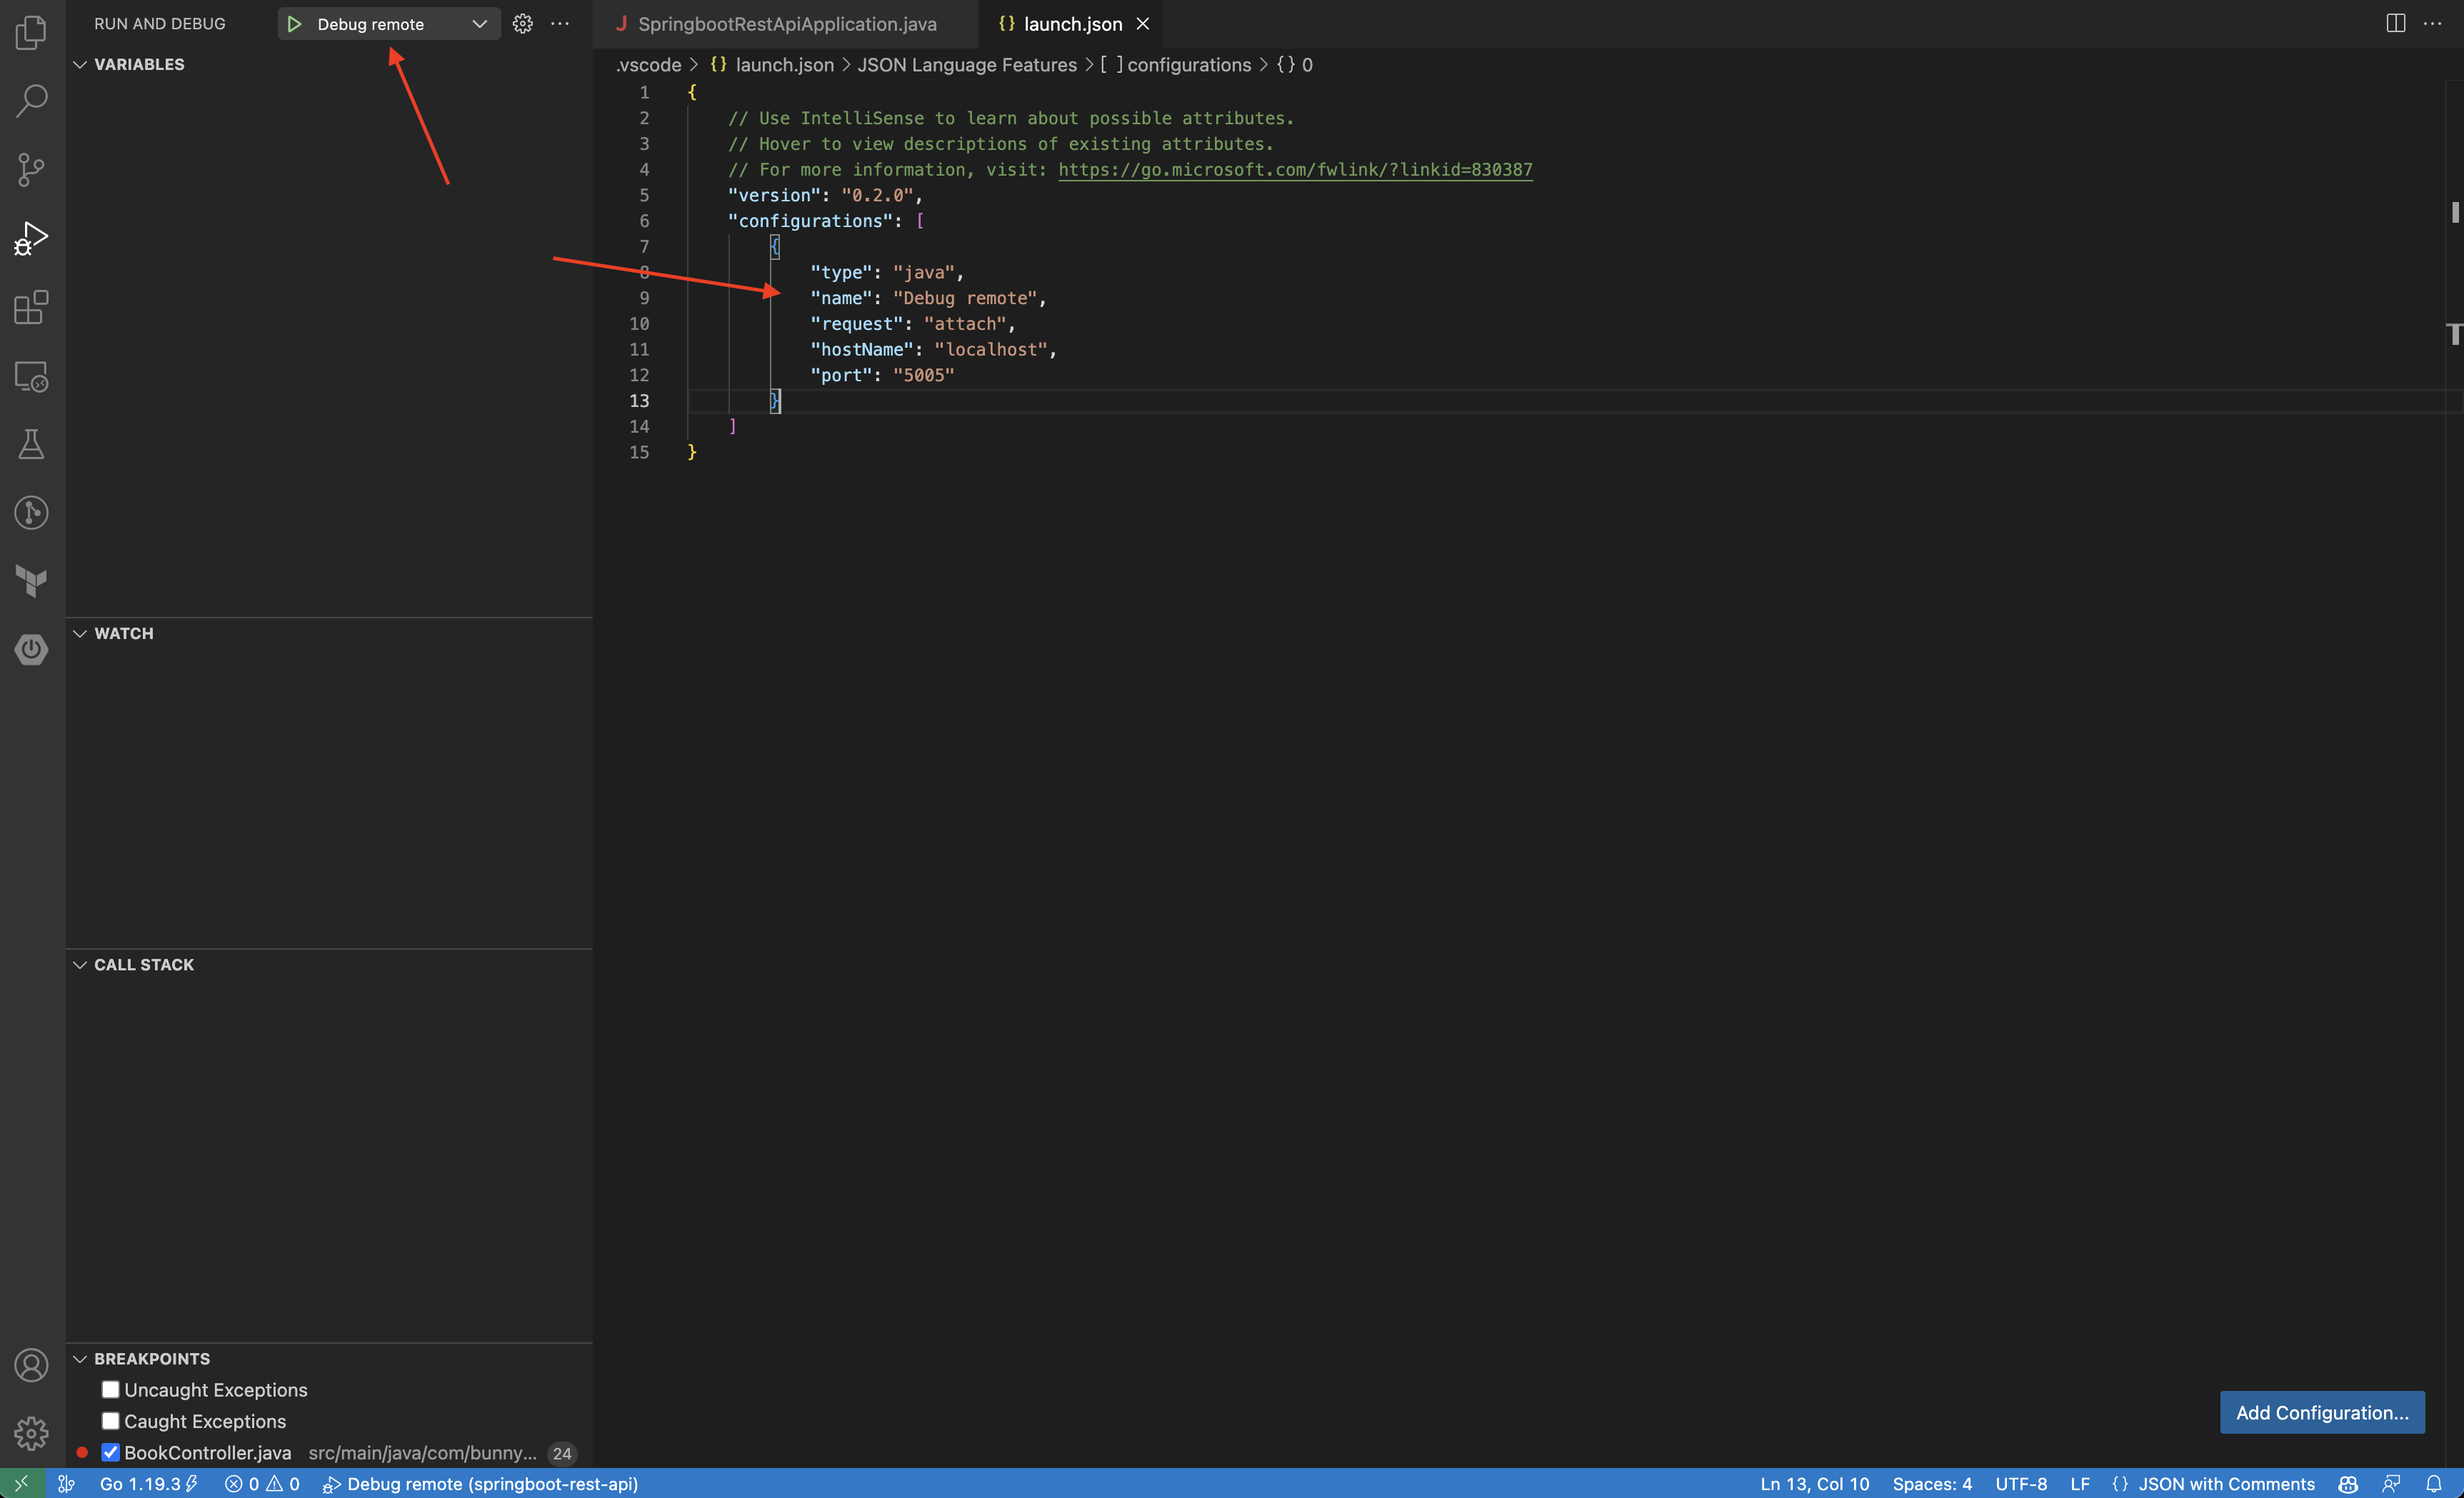
- Create or update if needed the configurations, so that you have a "Java: Attach" configuration like the following one. Update the "port" value if needed.
...
"configurations": [
  {
    "type": "java",
    "name": "Debug remote",
    "request": "attach",
    "hostName": "localhost",
    "port": "5005"
  }
]
...
You will be able to see the new configuration in the top of the screen.
- Open a terminal and start the Spring Boot application.
-
Click the green play button next to the configuration name. You will notice the layout of VS Code changing for debugging.
-
Add a breakpoint.
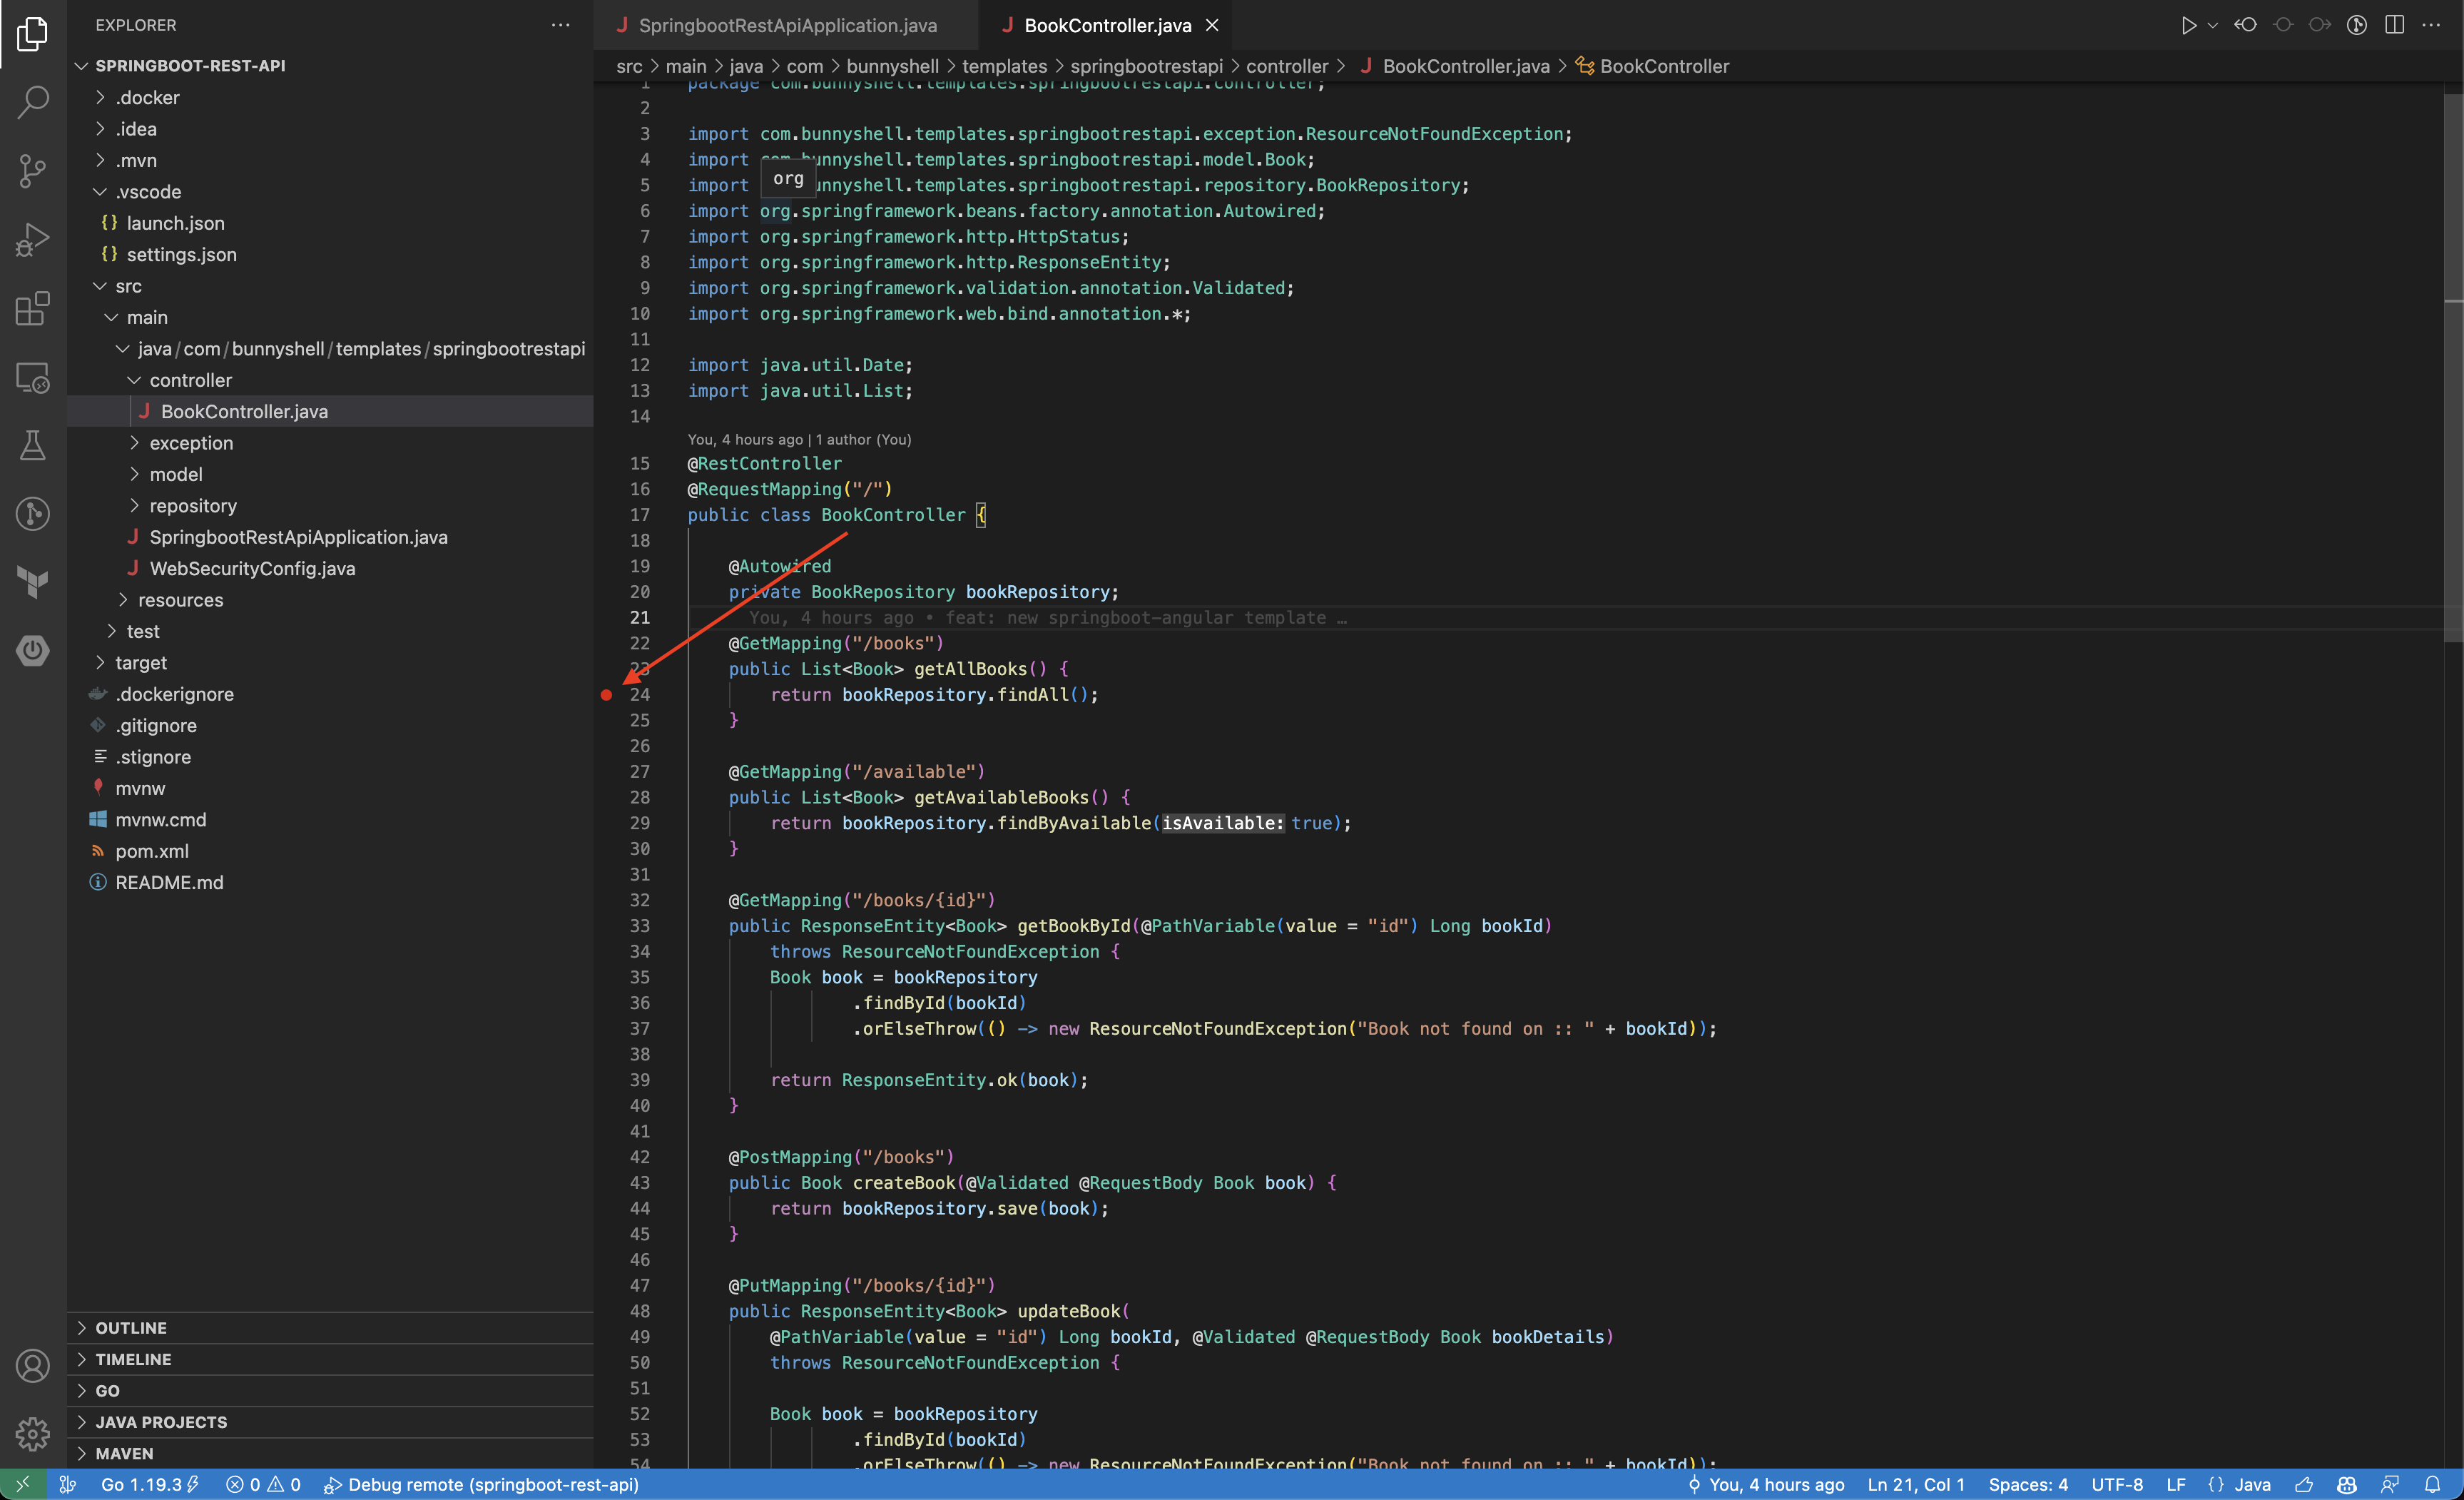
- Access the endpoint of the application to generate a request, and you will notice the breakpoint being hit.
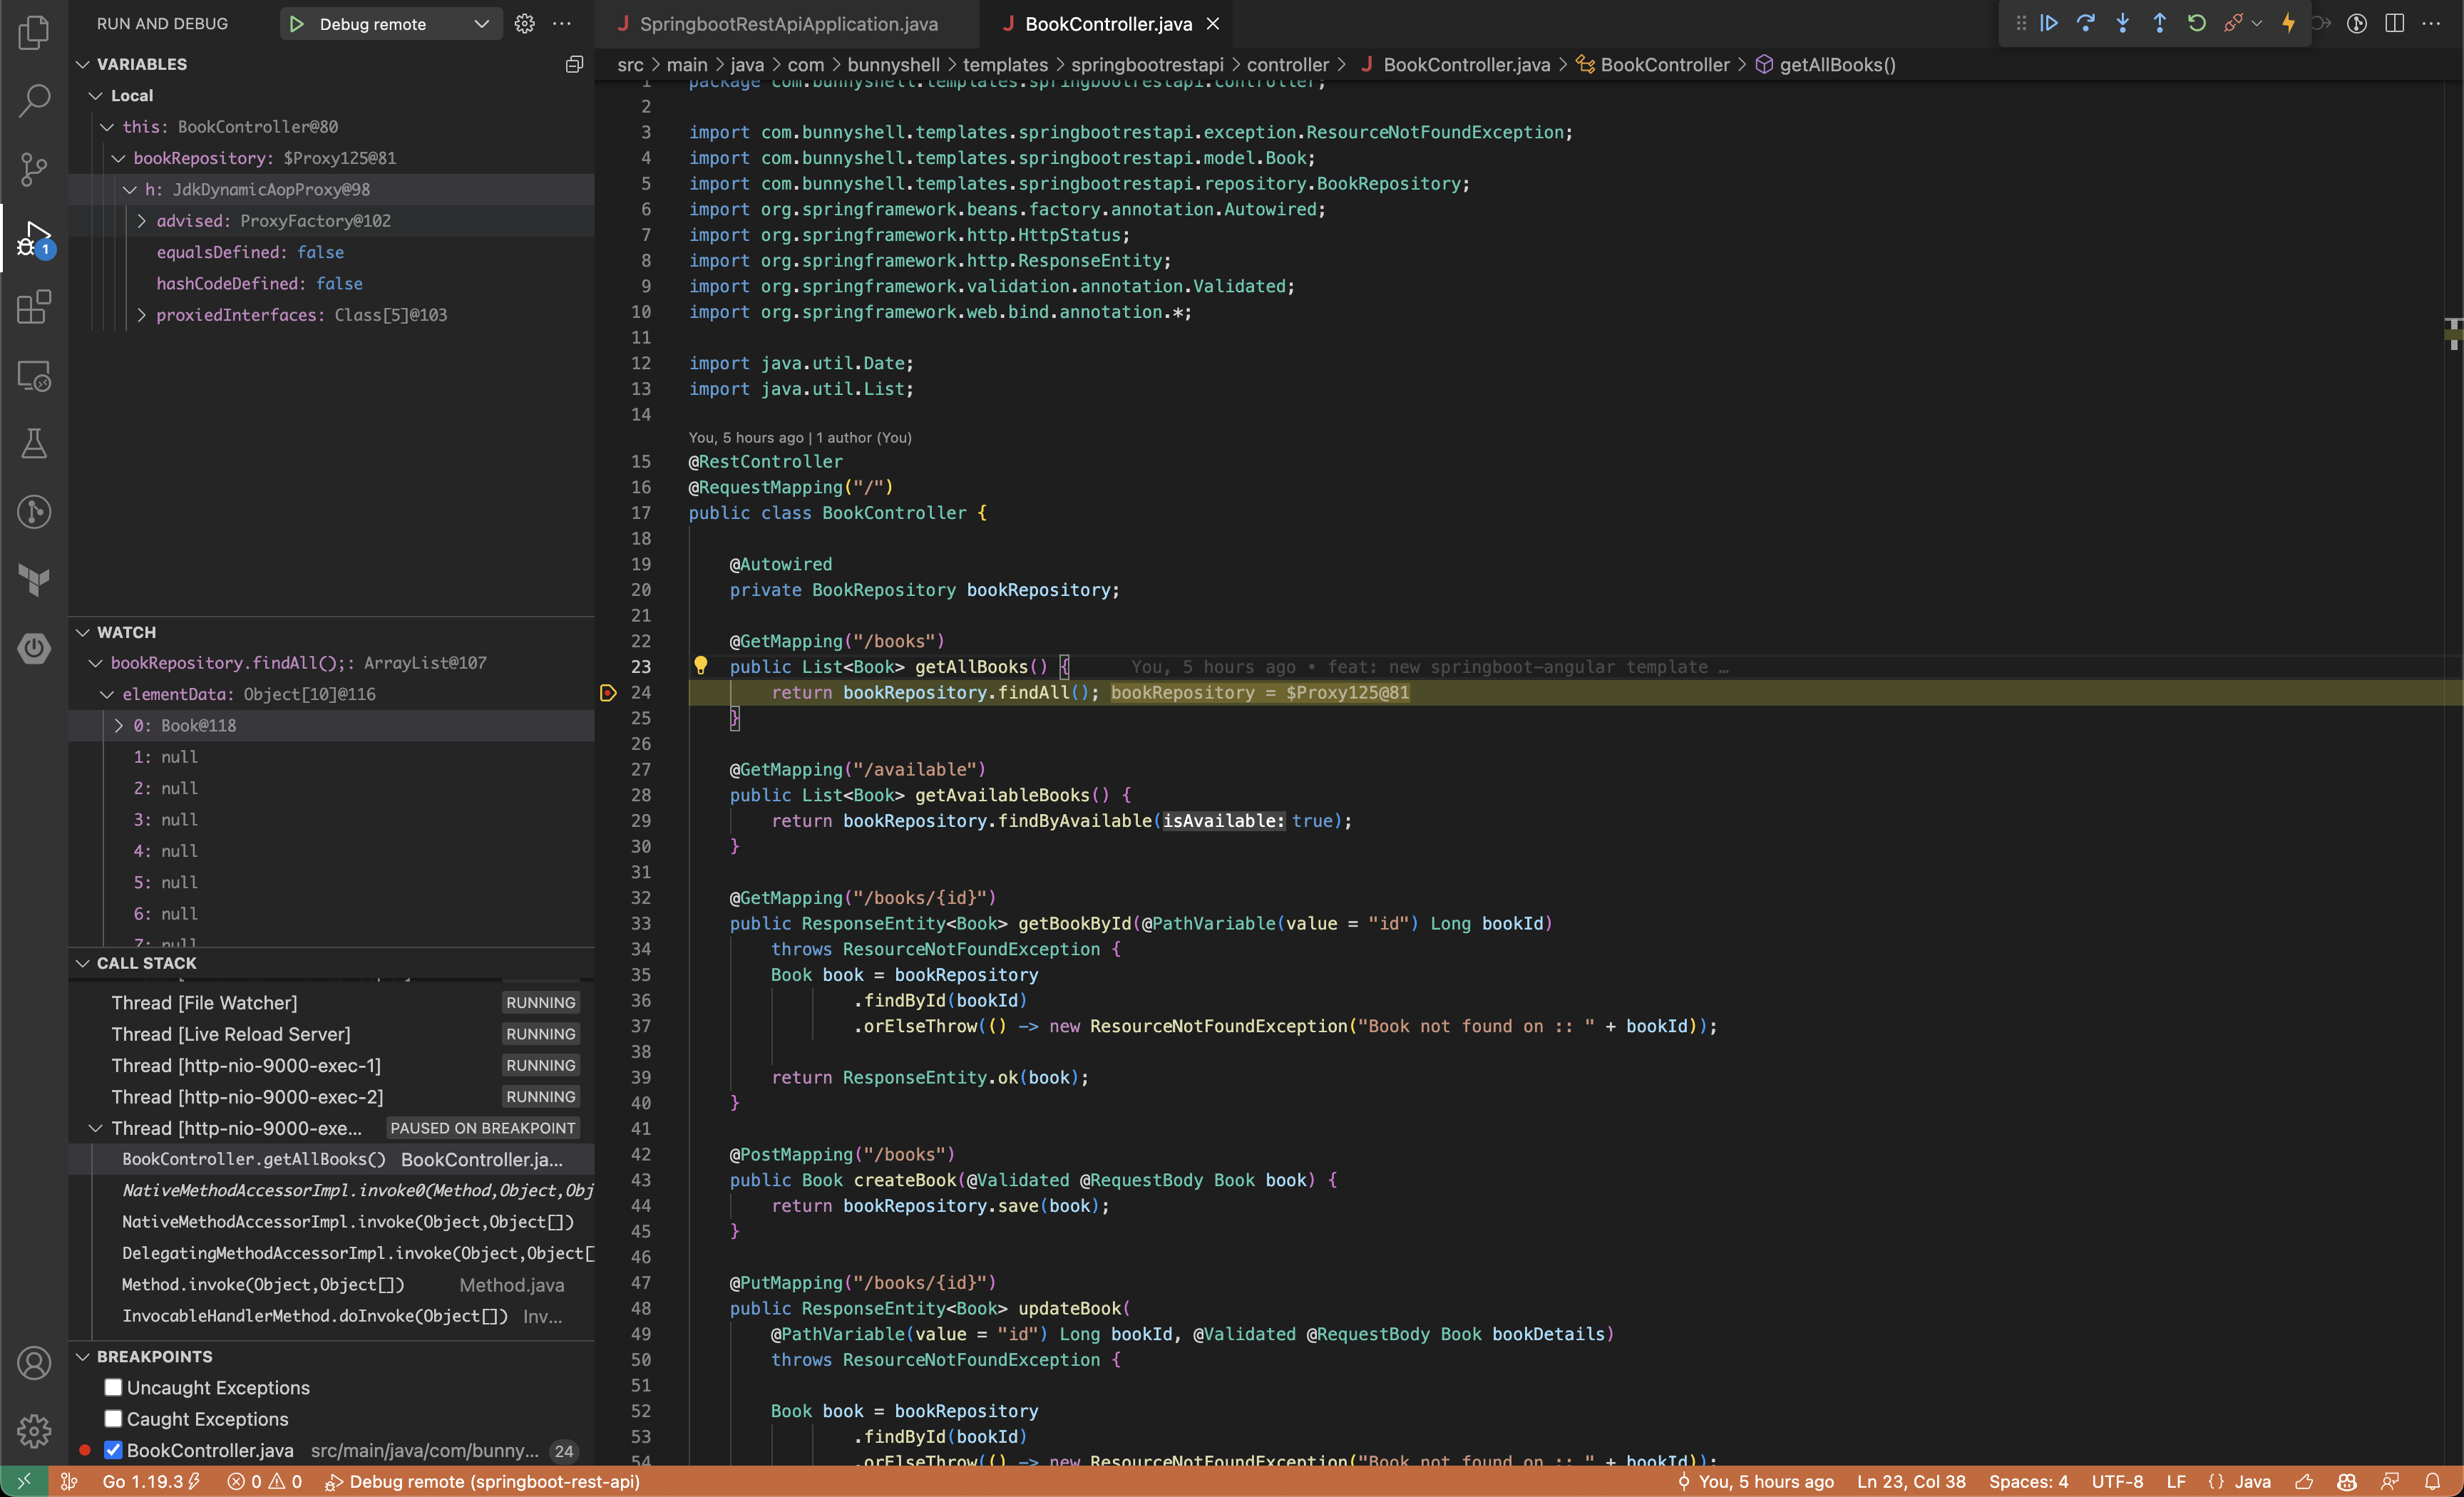
Congratulations! You are now able to debug Java applications remotely.
Updated 6 months ago
