Private Cluster docker-compose volumes
Cluster pre-requisites on being able to create volumes for docker-compose components
Introduction
For Private cluster, Bunnyshell supports both ReadWriteOnce (disk) and ReadWriteMany (network) volumes.
Disk volumes are most used, but usually they cannot be mounted on many cluster nodes simultaneously, in case you need them mounted on different Pods, or simply have a Deployment with many replicas, and not all Pods are scheduled on the same node.
So network volumes comes to the rescue, they can be mounted on many nodes, just like a classic NFS on many VMs.
As a solution, Bunnyshell will use two StorageClasses for provisioning PVCs, one for disk volumes bns-disk-sc and one for network volumes bns-network-sc. However, you need to create those classes by yourself, following the instructions below.
Variant 1 (Bunnyshell Volumes Add-on)
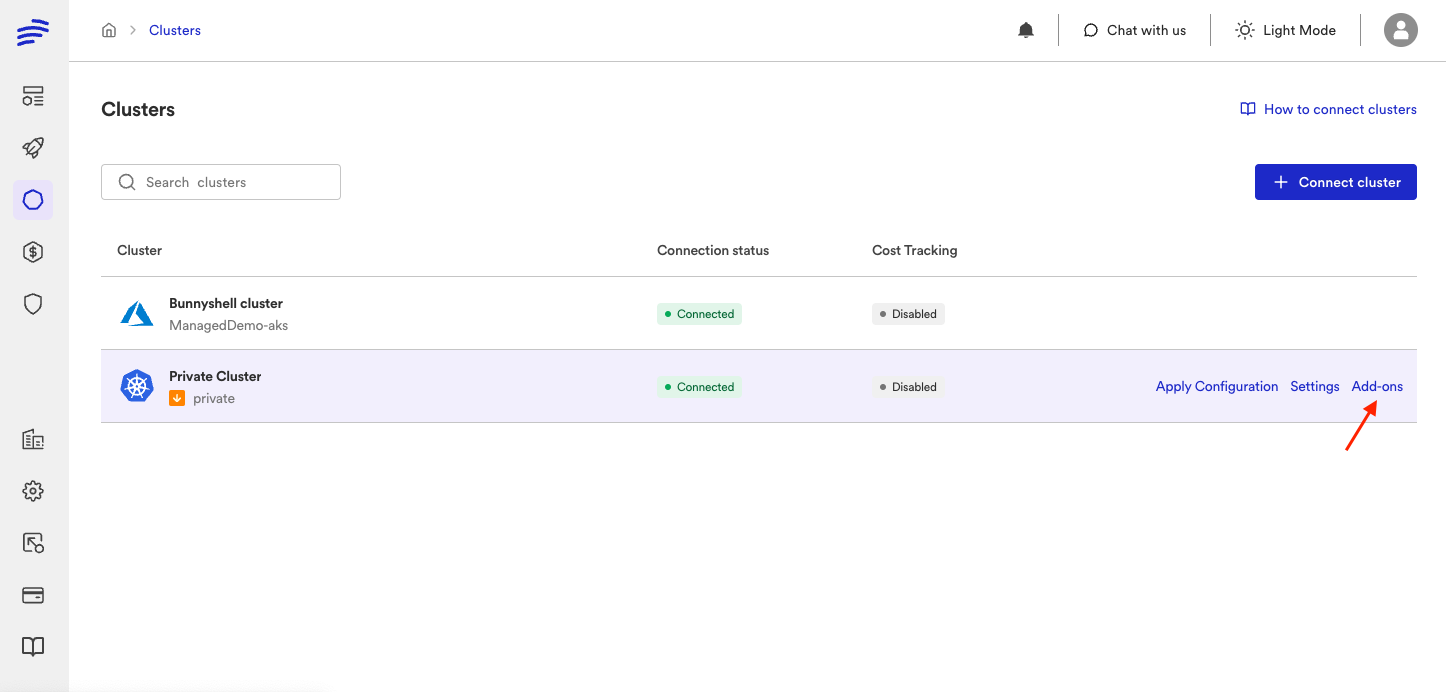
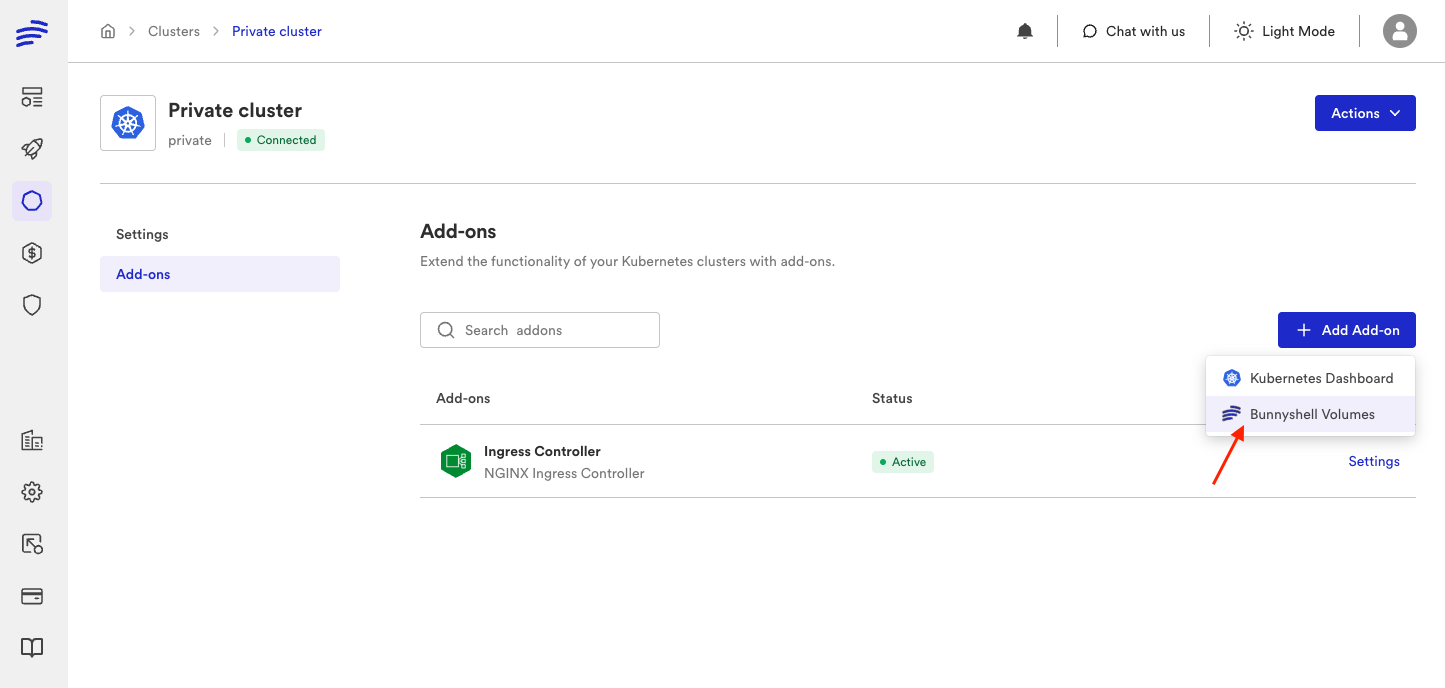
After you connected the cluster to Bunnyshell, go to Add-ons
Then select Bunnyshell Volumes add-on
You can set up all the special StorageClasses Bunnyshell will use, bns-builder-sc, bns-disk-sc and bns-network-sc.

You can specify a provisioner foreach StorageClass or, if left empty, Bunnyshell will detect the provisioner used by the default StorageClass in your cluster an use that. It's a good idea to have a StorageClass marked as default in your cluster, so you can create PVCs without specifying the storageClassName, but it's up to you, Bunnyshell itself doesn't require this.
Then "Enable Add-on" and Bunnyshell will start creating the enabled StorageClasses.
This variant should work for any cluster, but if you need more configuration on the StorageClasses, see below the manual variant. Don't forget to disable corresponding StorageClass from Add-on, so Bunnyshell won't update your manually configured class.
Variant 2 (Manual setup)
If you need more configuration on the StorageClasses than the Bunnyshell Volumes Add-on presented above can handle, you can create these classes manually. Make sure corresponding StorageClass option from Add-on is disabled, so Bunnyshell won't update your manually configured class, then you can proceed with the steps below.
Prerequisites
- Make sure you're connected to the cluster and that the cluster is the current config context.
- Install Helm. For detailed instruction, visit the Helm docs platform.
Setting the proper contextStarting here, you will work in the terminal. Make sure you're connected to the cluster and that the cluster is the current context. Use the command kubectl config --help to obtain the necessary information.
Steps to create Disk Volumes
For disk volumes you will create the bns-disk-sc StorageClass, and you will configure it with reclaimPolicy=Delete, so when PVCs are deleted, and PVs are no longer bound, they are automatically deleted too.
Creating the disk Storage Class
Check what storage provisioners do you have in you cluster and pick one to use for the StorageClass.
Create a bns-disk-sc.yaml file with the following contents:
apiVersion: storage.k8s.io/v1
kind: StorageClass
metadata:
    name: bns-disk-sc
provisioner: <your-provisioner-of-choice>
#parameters: # optional, if the provisioner requires them
#    key: "Value"
volumeBindingMode: WaitForFirstConsumer
reclaimPolicy: Delete
Apply the manifest:
kubectl apply -f bns-disk-sc.yamlCheck the Storage Class is created:
kubectl get sc bns-disk-scNAME PROVISIONER RECLAIMPOLICY VOLUMEBINDINGMODE ALLOWVOLUMEEXPANSION AGE
bns-disk-sc cinder.csi.openstack.org Delete WaitForFirstConsumer false 2m(In the example above we used cinder.csi.openstack.org provisioner as it was available in our cluster)
Testing the disk Storage Class
- Create the
test-disk-sc.yamlfile with the contents below. Later, the file will generate the test PVC and Pod:
---
apiVersion: v1
kind: PersistentVolumeClaim
metadata:
  name: test-pvc-disk
spec:
  resources:
    requests:
      storage: 1Gi
  accessModes:
    - ReadWriteOnce
  storageClassName: bns-disk-sc
---
apiVersion: v1
kind: Pod
metadata:
  name: test-app-disk
  labels:
    name: test-disk
spec:
  containers:
  - name: app
    image: alpine
    command: ["/bin/sh"]
    args: ["-c", "while true; do echo $(date -u) >> /data/out; sleep 5; done"]
    volumeMounts:
      - name: persistent-storage-disk
        mountPath: /data
    resources:
      limits:
        memory: "50Mi"
        cpu: "50m"
  volumes:
    - name: persistent-storage-disk
      persistentVolumeClaim:
        claimName: test-pvc-disk
- Apply the
test-disk-sc.yamlfile:
kubectl create ns test-disk-sc
kubectl apply -f test-disk-sc.yaml -n test-disk-sc- Wait until the
test-app-diskpod reach the statusRunning.
kubectl wait --for=condition=Ready pod/test-app-disk -n test-disk-sc- Check the Pod, PVC and the associated PV:
- PVC
test-pvc-diskisBound - PVC
test-pvc-diskuses STORAGECLASSbns-disk-sc - a PV was also created and it has the CLAIM the PVC above
- the PV has RECLAIM POLICY
Delete
kubectl get all,pv,pvc -n test-disk-scNAME READY STATUS RESTARTS AGE
pod/test-app-disk 1/1 Running 0 39s
NAME CAPACITY ACCESS MODES RECLAIM POLICY STATUS CLAIM STORAGECLASS REASON AGE
persistentvolume/pvc-40c1936f-3b1b-4175-a10e-906a4cf8b91c 1Gi RWO Delete Bound test-disk-sc/test-pvc-disk bns-disk-sc 39s
NAME STATUS VOLUME CAPACITY ACCESS MODES STORAGECLASS AGE
persistentvolumeclaim/test-pvc-disk Bound pvc-40c1936f-3b1b-4175-a10e-906a4cf8b91c 1Gi RWO bns-disk-sc 40s- (Optional) Verify that the
test-app-diskPod is writing OK data to the volume:
kubectl exec test-app-disk -n test-disk-sc -- bash -c "cat data/out"Fri Nov 17 14:14:08 UTC 2023
Fri Nov 17 14:14:13 UTC 2023
Fri Nov 17 14:14:18 UTC 2023- If the your results are similar with the output displayed above, then you've completed the process successfully and you can delete the test resources. Delete the PVCs and the Pods. This will also cause the PVs to be deleted (that's why we use
reclaimPolicy=Deleteon the StorageClass):
kubectl delete -f test-disk-sc.yaml -n test-disk-sc- Delete the test namespace
kubectl delete -n test-disk-sc
Steps to create Network Volumes
For network volumes you will create the bns-network-sc StorageClass, which will provision PVCs with the help of nfs-subdir-external-provisioner which will use a NFS server to actually store data. You will configure the StorageClass with reclaimPolicy=Delete, so when PVCs are deleted, and PVs are no longer bound, they are automatically deleted too.
Creating the NFS server
The NFS server consists of a PVC, where all the provisioned PVCs will be stored as folders, a Deployment with the actual nfs-server and a Service to expose the nfs-server in cluster. You will create all these in the bns-nfs-server namespace. As a measure of protection for the PVC, you will create also a StorageClass with reclaimPolicy=Retain
Start by creating the namespace:
kubectl create ns bns-nfs-serverThen save the following snippet in a file named nfs-server.yaml. Update the StorageClass provisioner and optionally the parameters.
---
apiVersion: storage.k8s.io/v1
kind: StorageClass
metadata:
  name: bns-nfs-sc
provisioner: <your-provisioner-of-choice>
#parameters: # optional, if the provisioner requires them
#    key: "Value"
volumeBindingMode: WaitForFirstConsumer
reclaimPolicy: Retain
---
apiVersion: v1
kind: PersistentVolumeClaim
metadata:
  name: nfs-server-bns-pvc
spec:
  storageClassName: bns-nfs-sc
  accessModes:
    - ReadWriteOnce
  resources:
    requests:
      storage: 100Gi # <- set a size that suits your needs
---
apiVersion: apps/v1
kind: Deployment
metadata:
    name: nfs-server
spec:
    replicas: 1
    selector:
        matchLabels:
            io.kompose.service: nfs-server
    template:
        metadata:
            labels:
                io.kompose.service: nfs-server
        spec:
            containers:
                - name: nfs-server
                  image: itsthenetwork/nfs-server-alpine:latest
                  volumeMounts:
                      - name: nfs-storage
                        mountPath: /nfsshare
                  env:
                      - name: SHARED_DIRECTORY
                        value: "/nfsshare"
                  ports:
                      - name: nfs
                        containerPort: 2049
                  securityContext:
                      privileged: true  # <- privileged mode is mandatory.
            volumes:
                - name: nfs-storage
                  persistentVolumeClaim:
                      claimName: nfs-server-bns-pvc
---
apiVersion: v1
kind: Service
metadata:
    name: nfs-server
    labels:
        io.kompose.service: nfs-server
spec:
    type: ClusterIP
    ports:
        -
            name: nfs-server-2049
            port: 2049
            protocol: TCP
            targetPort: 2049
    selector:
        io.kompose.service: nfs-server
Apply the manifests to create the NFS server:
kubectl apply -f nfs-server.yaml -n bns-nfs-server Check that the Pod is Running, the Deployment is Ready, the Service has CLUSTER-IP and the PVC is Bound
kubectl get all,pvc -n bns-nfs-serverNAME READY STATUS RESTARTS AGE
pod/nfs-server-59b5d596c8-28xmh 1/1 Running 0 16m
NAME TYPE CLUSTER-IP EXTERNAL-IP PORT(S) AGE
service/nfs-server ClusterIP 10.254.2.218 <none> 2049/TCP 16m
NAME READY UP-TO-DATE AVAILABLE AGE
deployment.apps/nfs-server 1/1 1 1 16m
NAME DESIRED CURRENT READY AGE
replicaset.apps/nfs-server-59b5d596c8 1 1 1 16m
NAME STATUS VOLUME CAPACITY ACCESS MODES STORAGECLASS AGE
persistentvolumeclaim/nfs-server-bns-pvc Bound pvc-b9712e48-48da-4dd3-b6e0-99979848cabc 100Gi RWO bns-nfs-sc 16mGet the NFS Service IP, and store it in a variable.
NFS_SERVICE_IP=$(kubectl get service nfs-server -n bns-nfs-server -o=jsonpath='{.spec.clusterIP}')
echo $NFS_SERVICE_IP10.254.2.218(Yes, it's the Service CLUSTER-IP you saw earlier)
Use a Helm chart to create the NFS provisioner and the Storage Class
Add the following Helm Chart repository:
helm repo add nfs-subdir-external-provisioner https://kubernetes-sigs.github.io/nfs-subdir-external-provisioner/Install the Helm Chart to create the nfs-subdir-external-provisioner and the bns-network-sc Storage Class. See above how to obtain the $NFS_SERVICE_IP variable.
helm install nfs-subdir-external-provisioner nfs-subdir-external-provisioner/nfs-subdir-external-provisioner \
  -n bns-nfs-server \
  --set nfs.server="$NFS_SERVICE_IP" \
  --set nfs.path="/" \
  --set storageClass.name=bns-network-sc \
  --set storageClass.reclaimPolicy=Delete \
  --set "nfs.mountOptions={nfsvers=4.1,proto=tcp}"
Wait until the Storage Class is created, check status using command:
kubectl get sc bns-network-scNAME PROVISIONER RECLAIMPOLICY VOLUMEBINDINGMODE ALLOWVOLUMEEXPANSION AGE
bns-network-sc cluster.local/nfs-subdir-external-provisioner Delete Immediate true 29m
Testing the network Storage Class
- Create the
test-network-sc.yamlfile with the contents below. Later, the file will generate the test PVC and Pod:
---
apiVersion: v1
kind: PersistentVolumeClaim
metadata:
  name: test-pvc-network
spec:
  resources:
    requests:
      storage: 1Gi
  accessModes:
    - ReadWriteMany
  storageClassName: bns-network-sc
---
apiVersion: v1
kind: Pod
metadata:
  name: test-app-network
  labels:
    name: test-network
spec:
  containers:
  - name: app
    image: alpine
    command: ["/bin/sh"]
    args: ["-c", "while true; do echo $(date -u) >> /data/out; sleep 5; done"]
    volumeMounts:
      - name: persistent-storage-network
        mountPath: /data
    resources:
      limits:
        memory: "50Mi"
        cpu: "50m"
  volumes:
    - name: persistent-storage-network
      persistentVolumeClaim:
        claimName: test-pvc-network
- Apply the
test-network-sc.yamlfile:
kubectl create ns test-network-sc
kubectl apply -f test-network-sc.yaml -n test-network-sc- Wait until the
test-app-networkpod reach the statusRunning.
kubectl wait --for=condition=Ready pod/test-app-network -n test-network-sc- Check the Pod, PVC and the associated PV:
- PVC
test-pvc-networkisBound - PVC
test-pvc-networkuses STORAGECLASSbns-network-sc - a PV was also created and it has the CLAIM the PVC above
- the PV has RECLAIM POLICY
Delete
kubectl get all,pv,pvc -n test-network-scNAME READY STATUS RESTARTS AGE
pod/test-app-network 1/1 Running 0 11m
NAME CAPACITY ACCESS MODES RECLAIM POLICY STATUS CLAIM STORAGECLASS REASON AGE
persistentvolume/pv-nfs-subdir-external-provisioner 10Mi RWO Retain Bound bns-nfs-server/pvc-nfs-subdir-external-provisioner 55m
persistentvolume/pvc-b9712e48-48da-4dd3-b6e0-99979848cabc 100Gi RWO Retain Bound bns-nfs-server/nfs-server-bns-pvc standard 45m
persistentvolume/pvc-bd3bbc3c-040c-4d20-a3d6-007eee507a5e 1Gi RWX Delete Bound test-network-sc/test-pvc-network bns-network-sc 11m
NAME STATUS VOLUME CAPACITY ACCESS MODES STORAGECLASS AGE
persistentvolumeclaim/test-pvc-network Bound pvc-bd3bbc3c-040c-4d20-a3d6-007eee507a5e 1Gi RWX bns-network-sc 11m- (Optional) Verify that the
test-app-networkPod is writing OK data to the volume:
kubectl exec test-app-network -n test-network-sc -- bash -c "cat data/out"Fri Nov 17 14:14:08 UTC 2023
Fri Nov 17 14:14:13 UTC 2023
Fri Nov 17 14:14:18 UTC 2023- If the your results are similar with the output displayed above, then you've completed the process successfully and you can delete the test resources. Delete the PVCs and the Pods. This will also cause the PVs to be deleted:
kubectl delete ns test-network-sc
(Optional) Create a default StorageClass
In case you don't have a default StorageClass in cluster, it's a good idea to create one, so you can create PVCs without specifying the storageClassName, it will use the default one. Read more about the Default Storage Class
- Check if you already have a default StorageClass
kubectl get storageclass -o json | jq '.items[] | select(.metadata.annotations["storageclass.kubernetes.io/is-default-class"] == "true")'{
"allowVolumeExpansion": true,
"apiVersion": "storage.k8s.io/v1",
"kind": "StorageClass",
"metadata": {
"annotations": {
"storageclass.kubernetes.io/is-default-class": "true"
},
"creationTimestamp": "2023-11-16T11:37:01Z",
"name": "standard",
"resourceVersion": "1170",
},
"provisioner": "cinder.csi.openstack.org",
"reclaimPolicy": "Retain",
"volumeBindingMode": "Immediate"
}If you get something similar with the above output, then you are done, no need to create a new StorageClass
- If the above output is empty, then you don't have any default StorageClass in your cluster, here is how to create one. Create the
default-sc.yamlfile. Again update theprovisionerand optionally theparameters.
apiVersion: storage.k8s.io/v1
kind: StorageClass
metadata:
    name: default
    annotations:
        storageclass.kubernetes.io/is-default-class: "true"
provisioner: <your-provisioner-of-choice>
#parameters: # optional, if the provisioner requires them
#    key: "Value"
volumeBindingMode: WaitForFirstConsumer
reclaimPolicy: Deletekubectl apply -f default-sc.yaml- Run again the command from the first step and now you will see it shows the default StorageClass.