Workflow details
Introduction
In this short section, we'll take a quick look at what happened under the hood, in order to understand:
- How deployment works in Bunnyshell
- What the end result is in Kubernetes
Deployment
The Deployment flow is straightforward:
Queue -> Build (if needed) -> Deployment -> DNS Records -> Running Environment
Once a deployment is triggered, the Environment gets Queued, then, if needed, the images are built.
NoteThe build may not be needed if:
- The image was already built (there are no code changes from a previous build)
- The Component is using a public image
The actual Deployment phase is started once all images are available. Bunnyshell creates the Kubernetes manifests for the Environment, and applies them into a dedicated Kubernetes Namespace, isolated from other Namespaces for security purposes.
Bunnyshell will create:
- The Ingress
- A Kubernetes Service for each Component that has at least a port exposed
- A Kubernetes Deployment, which has the default replica number set at 1
- The actual Pod(s)
- Persistent Volume Claims, if needed
Bunnyshell also creates the DNS records for the publicly exposed endpoints.
The replica count can be set from docker-compose.yaml by setting the property deploy.replicas for each service.
services:
  ...
  backend:
    build:
      context: ./backend
      target: ${FRONTEND_BUILD_TARGET:-dev}
    ...
    deploy:
      replicas: 3
NoteIn the situation above, the backend will have 3 Pods created within the Kubernetes ReplicaSet, in the Deployment.
Once the Kubernetes manifests are applied, the flow enters a pending state, in which it waits for the resources to be up and running.
Finally, the Environment enters the Running state and you can use it.
NoteKeep in mind that Bunnyshell provides additional (advanced) mechanisms to handle deployments, by declaring the pod property, which allows the use of Init- and Sidecar- containers.
Building images
The image building process is performed with Kaniko or BuildKit in a Kubernetes cluster.
This cluster can be Bunnyshell's managed cluster, or your own Kubernetes cluster.
The image is pushed either in Bunnyshell's managed Registry, or your own Image Registry.
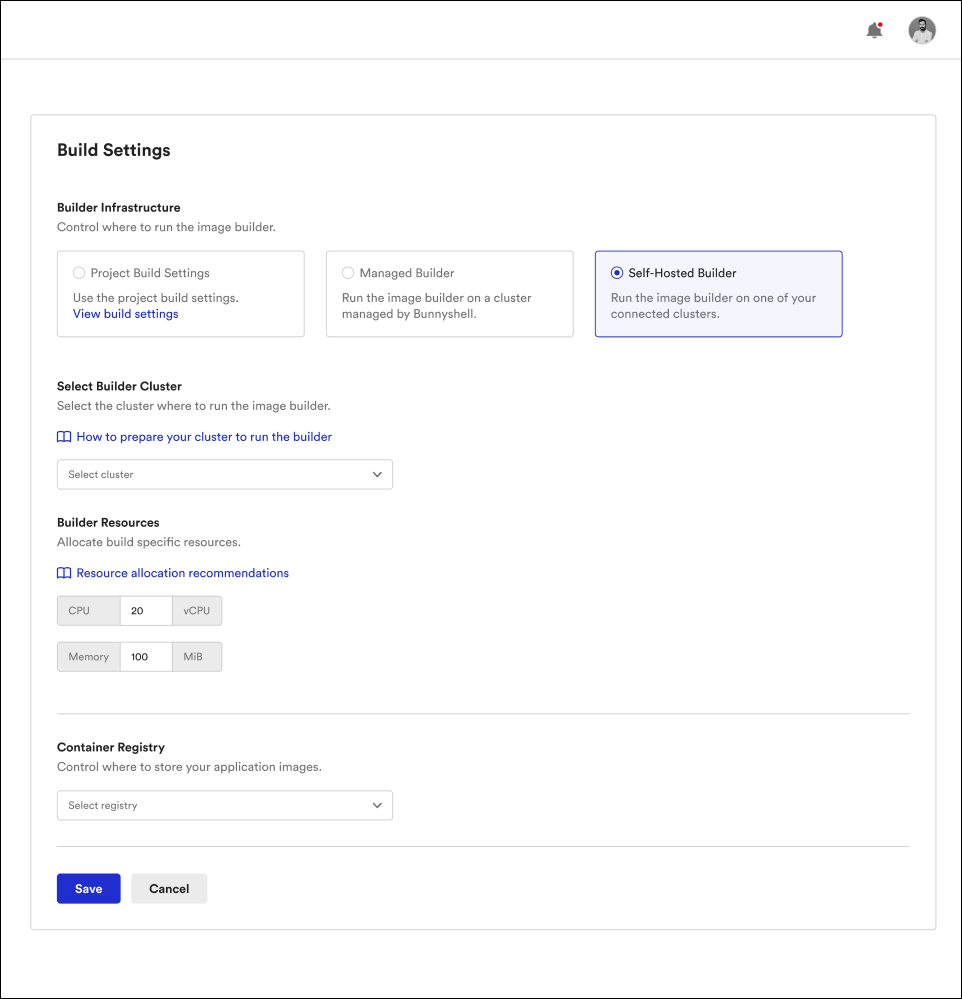
Build Settings
From the Environment Settings, you can control where and how the build is performed, by choosing:
- The cluster on which the images will be built for the current Environment
- The Image Registry where the image will be pushed after it is built
- The build engine to use, BuildKit (recommended) or Kaniko
- Allocated resources, such as CPU & memory (only when using your own cluster)
NoteThe Kubernetes cluster will have access to the same Image Registry, by injecting credentials it as an Image Pull Secret.
NoteAdditional information on this subject is available in the Build Settings documentation page.

Kubernetes snapshot
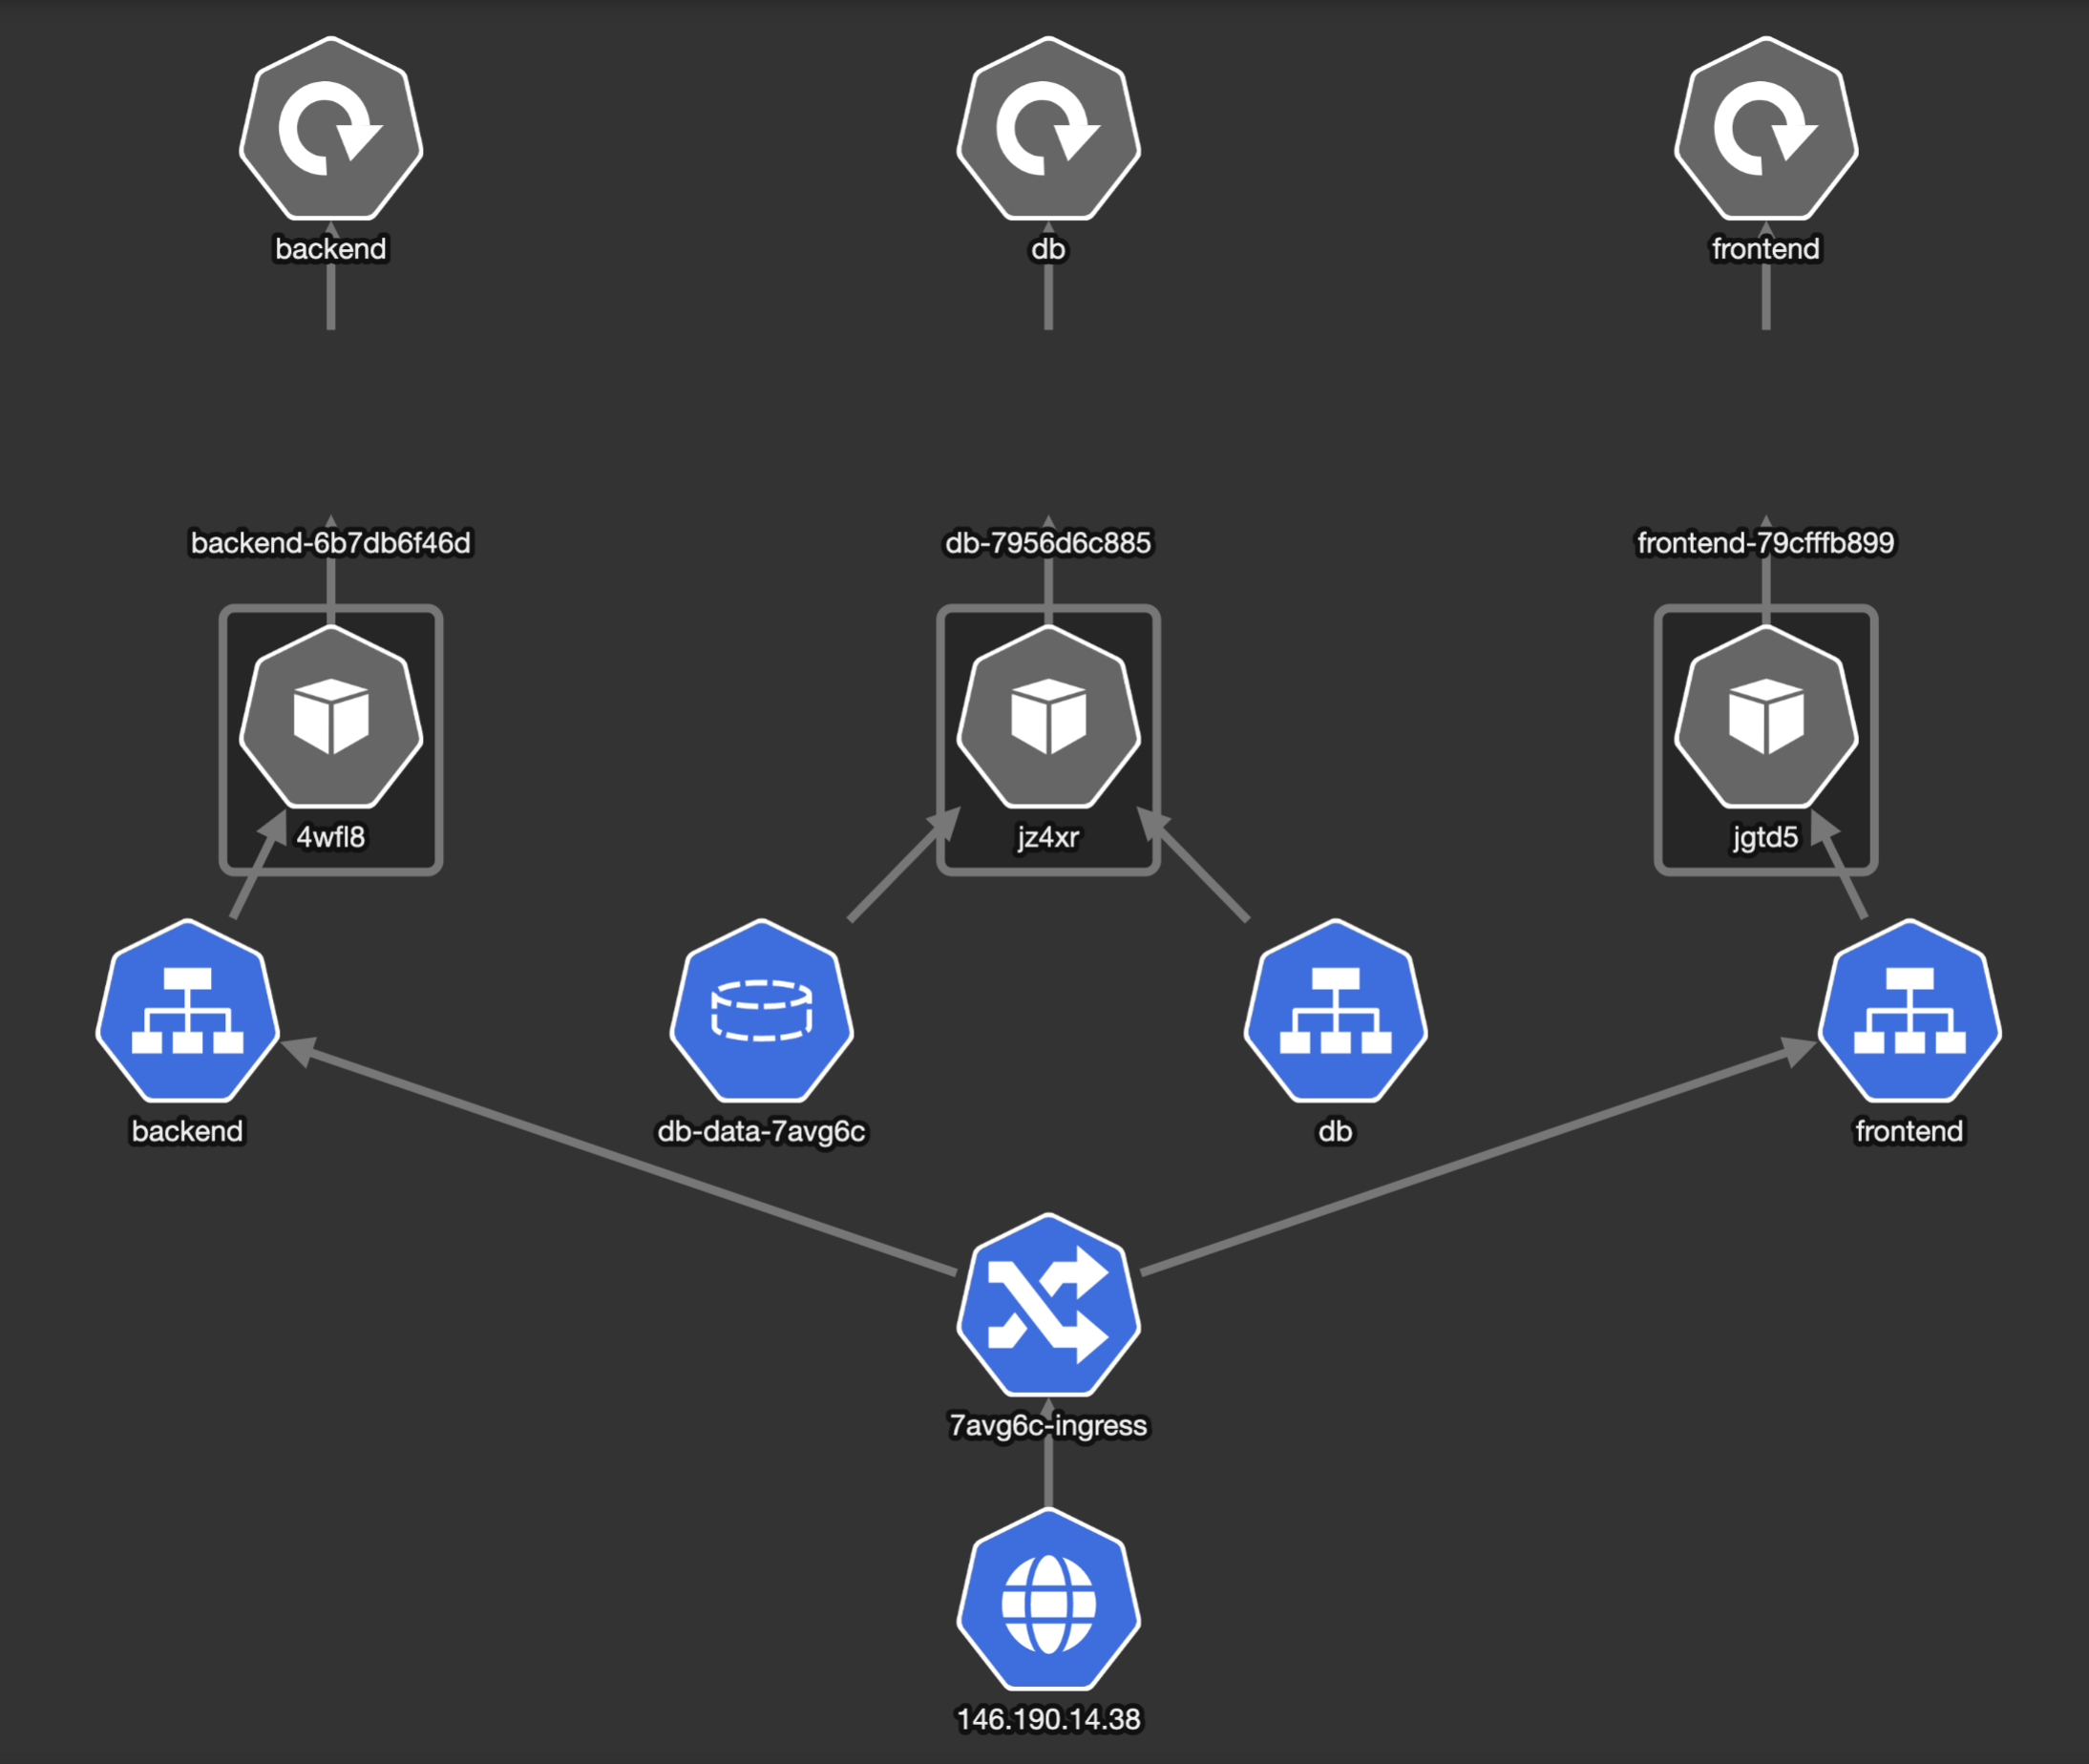
This is how the Environments for the Books Demo App looks like in Kubernetes after applying the generated manifests:

A request comes into the Cluster and goes through the Namespace Ingress, where it is forwarded to either frontend or backend.
Both the frontend and backend services have their separate Kubernetes Service that handles requests, and forward them to their respective Pods. The Pods are created as part of a Deployment, with a number of 1 replicas for each. This means a single Pod is running for each of them.
The db service also has a Kubernetes Service, but the Ingress does not forward traffic to it, as it is not publicly exposed, but only available from within the Namespace. It also has a PersistentVolumeClaim, for persistently storing the data.
Updated 5 months ago
